The Antec P150 Quiet PC Case Review
Case Impressions

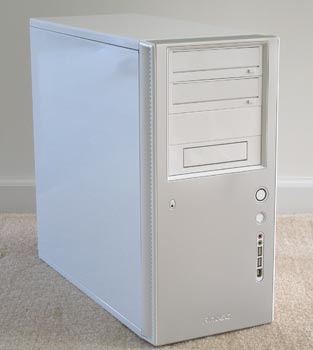
The front of the Antec P150 is simplistic yet fully functional at the same time. With no front door to get in the way of the optical drives and/or break off over the years, the Antec P150 is very clean looking. The clear coated white paint really has a nice shine in direct light and the brushed aluminum front panel helps set off the front of the case. To bring everything together Antec put a blue LED bezel around the power button.

On the back of the case the TriCool 120mm case fan location can be clearly seen along with the 80mm fan used to cool the Antec Neo HE430 power supply. The 120mm fan found in the P150 is 3-way adjustable and operates between 102V ~ 13.8V depending on the setting. When set at low (1,200 RPM) the fan moves 39CFM at an acoustical noise level of 25 dBA. If you want better cooling move it up to medium (1,600 RPM) for 56 CFM of air flow and 28dBA. If noise is not a concern it can be bumped up to high (2,000 RPM) for an air flow rating of 79 CFM at 30 dBA. I found medium to be a perfect setting for my desktop, but try out the three setting to see for yourself. The empty PCI slots and I/O panel tells me that I need to get busy putting this system together

Removing the side panel is a breeze thanks to the two tooless thumb screws that hold the side panel on. The above picture is how the case will look when it arrives and is pulled out of the shipping box. The accessory bundle is zip tied to the case frame and all of the other cables are either twist tied together or zip tied. If you look just below the top of the case at the far side panel you can see black material. This is the sound-deadening that Antec speaks about and these are found on the sides and the top of the case.

After cutting down and opening the accessory bag to the P150 you will find a lot of power cables because the Neo HE430 is a module power supply! Being a modular power supply the owner can choose to use only the power cables needed. Since most consumers wont need all of them it will clean up the inside of the case, which means better airflow! The bundle also includes the user’s manual, power cable, and the hardware bag. Now that we have the case open and the accessory bag is open let’s start putting the system together.

Starting with the hard drives we had to open the front door to get to the mounting trays. By releasing the three plastic clips that hold the front door to the case we were able to swing the front panel open in a matter of seconds. With the front panel swung open we can see the air filter which is mission critical for pet owners.

The front panel can be easily removed by lifting it up and out of the hinge as no wires actually go to the front panel. The air filter is removed by pressing the two clips in on the left side and pulling it out making for easy cleaning. With the air filter removed it can be clearly seen that Antec left room for two additional 92mm fans to be installed if the case owner wants to add more fans. I still can’t get to the hard drive mounting area yet, so let’s keep taking stuff apart.

By removing the two thumb screws on the fan panel we were able to gain access to the hard drive mounting area. Before we slap a hard drive in, let’s take a look at the hard drive mounting choices.

Comments are closed.