Riotoro CR1080 Tiny ATX Case Review
Riotoro CR1080 Build
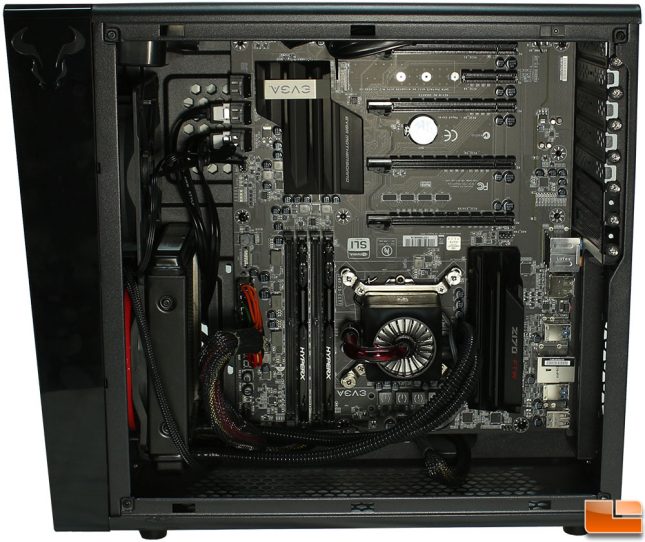
The only thing left to install is the GPU, before we get that done, let’s take a look at what we found when building the system. Let’s take a quick note of the cable management, the tighter the space inside the case the harder it is to route cables without proper planning. After doing some quick thinking I decided where I wanted to route cables and only had to make one change to the original plan, in relation to the large 24-pin power connection. Also, typically I install the CPU cooler after the motherboard has been installed as I have become accustomed to holes in the motherboard tray designed to facilitate installing the cooler at any time, the Riotoro CR1080 does not have a hole in the motherboard tray, so make sure any CPU cooler support bracket is in place prior to securing the motherboard.
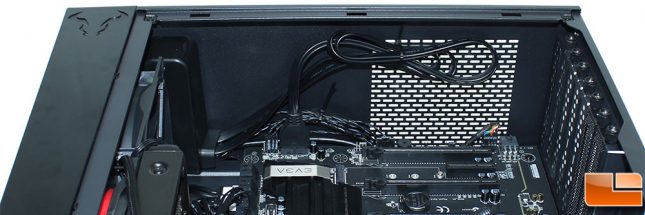
Not many places at the top of the case to secure cables, and the USB 3.0 connector is rather long and thick. It was easier to bundle it at the top of the case rather than trying to route it behind the motherboard tray. The other front panel connections are so close to where they begin there is a large amount of extra cables, these cables are small and easily routed through the hole at the top of the motherboard tray so they can be hidden on the other side of the case. While the top isn’t specifically designed to support a fan, it would be possible to install a 60mm fan, or an 80mm fan; it would be a tight fit.
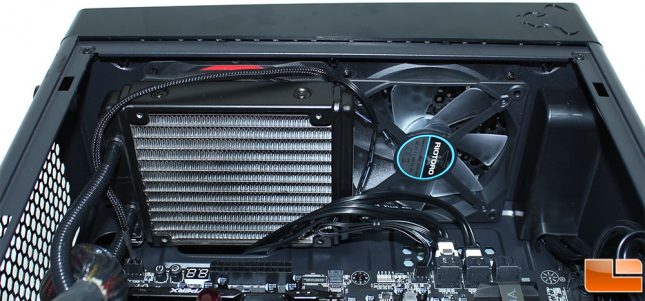
The front of the case came with the pre-installed 120mm intake fan and this is the only location to install an AIO liquid cooler. Riotoro specifically says a 120mm fan and a 120mm radiator will fit here. I would think a 240mm radiator would fit here though, unfortunately I didn’t have one immediately available to verify.
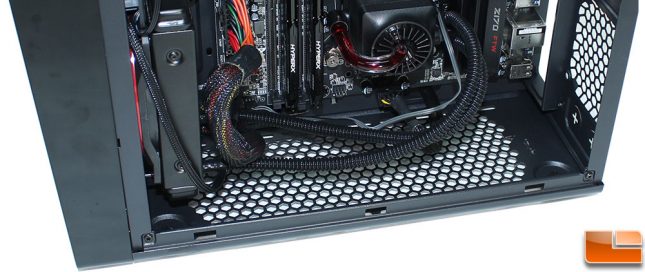
Rather than using the hole in the motherboard tray to route the large 24-pin ATX power cable, I ended up using the hole at the bottom of the case. With the AIO liquid cooler installed, not much space was left in the hole underneath the cooler. The 8-pin auxiliary power connector for this motherboard was routed trough the hole at the bottom of the case, making it easily hidden. On the bottom panel, Riotoro says it’ll support up to two 120mm fans, which is technically true, you’ll want to install them early to try avoiding fighting with other cables when installing them.
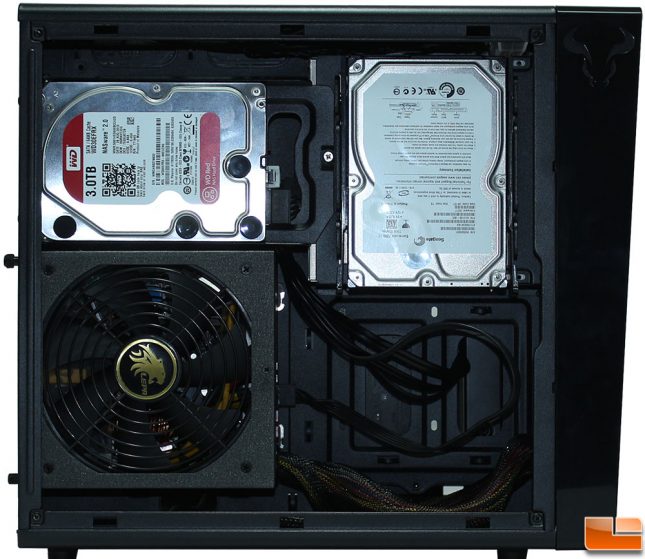
With the two 3.5″ hard drives, one 2.5″ SSD, 5.25″ optical drive and the power supply installed, we can see the amount of room left for cable management. Beneath the power supply is the hole that is used to route the motherboard’s 4 or 8 pin auxiliary power cable. The other power cables can be routed through the bottom holes or the little bit of room left from the other holes after the AIO liquid cooler was installed. Cable management can be accomplished, it just takes a little forethought.
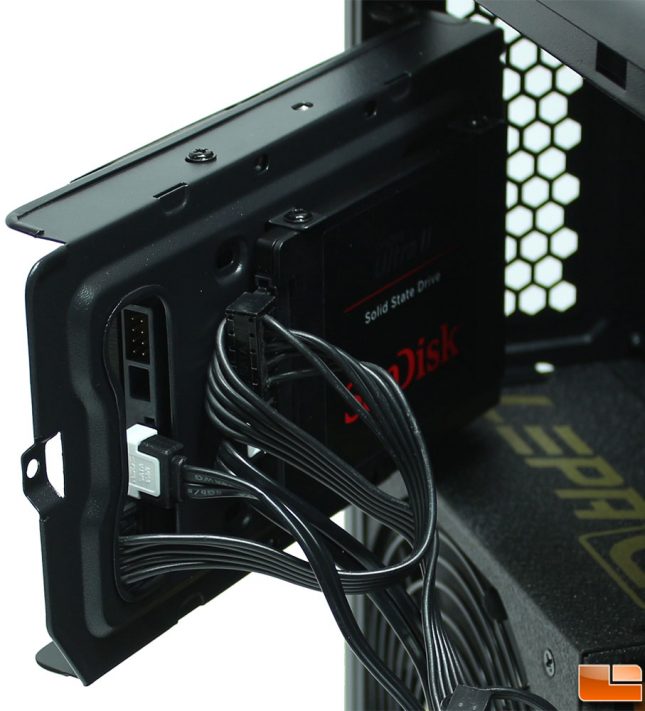
Installing the 2.5″ SSD behind the 3.5″ hard drive is easy, connecting the cables though can be a little daunting. With limited space, you’ll have to be sure to think out the cables and which connectors make the most sense. If I was to change the SSD to have the label side towards the tray, I could use another right angle SATA cable and make thing a little easier, along with making it easier to attach the power cable.
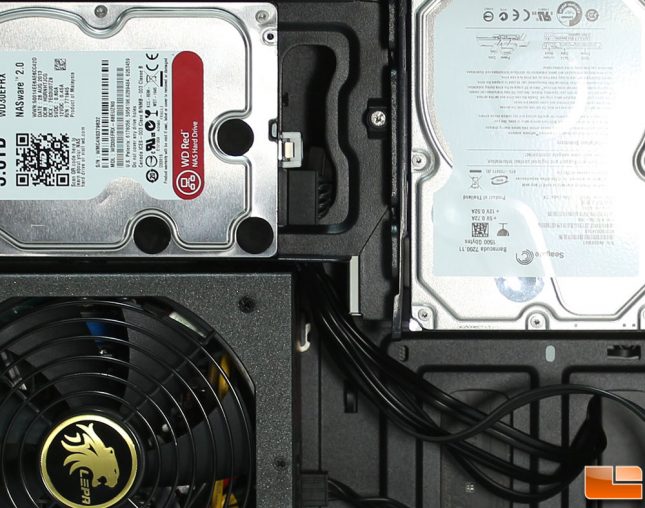
Routing cables for the 5.25″ optical drive, 2.5″ SSD and 3.5″ hard drive can be done by routing the cables between the power supply and the optical drive bay. It is a little tight to get them all to fit, but if you have a good power supply with flat cables you shouldn’t have too many issues. The other option is to route the cables on top of the 3.5″/2.5″ tray.
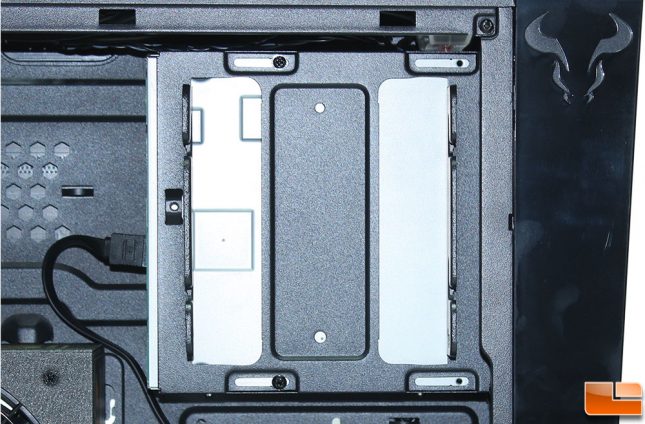
Installing the 5.25″ optical drive is done rather easily. Simply side the drive in from the front of the case (after removing the front panel) and secure it to the case with four screws on the bottom of the drive. For those that might want to have an additional hard drive, you could always skip the optical drive and put another hard drive here. Unfortunately, the pre-drilled holes in this area do not correspond with the holes on the bottom of a hard drive, so you’ll have to drill an additional hole, in order to have the drive secured by two holes (or get yourself a 3.5″ hard drive adapter to fit the 5.25″ bay).
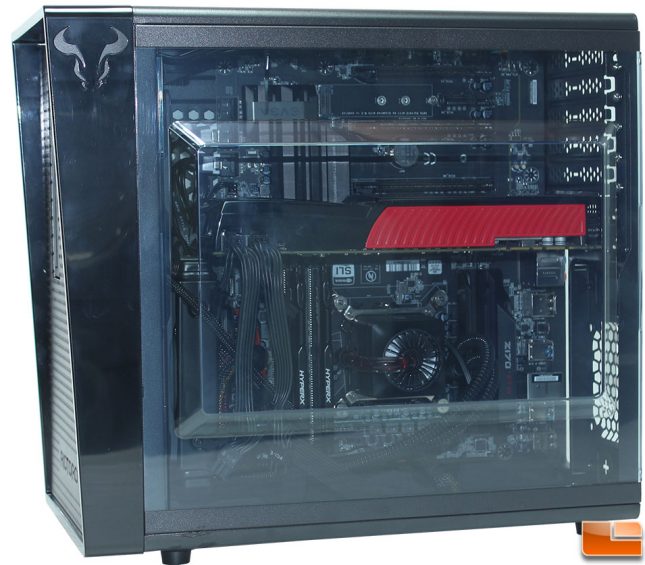
With the system powered up, I found that the top I/O cluster has a red LED ring around it; while this makes a nice effect, it doesn’t look right with a blue LED fan. Looking through the side panel window, you can see everything that is on the motherboard side as the entire side panel is clear. The section of the side panel that is raised is helpful for those power cables on the GPU, while it wasn’t necessary, it was nice not to have to bend those wires a lot to get it to fit. Thankfully the NVIDIA EVGA GTX275 I installed is a standard height GPU, there are some now that are slightly taller than the expansion slots, and then if you wanted to run them in SLI or CrossFireX you might run into height issues; keeping in mind Riotoro says the maximum height for the CPU cooler is 120mm, so I would take that as the maximum height for the GPU (and any SLI bridges you might want to use).
