Noctua NH-L12 Low Profile CPU Cooler Review
Installing the Noctua NH-L12

Noctua provides everything to install the NH-L12, even the screwdriver.

In the common parts bag is thermal paste, L.N.A. adaptors, Y power cable, power cable extension, rubber mounts and fan screws for attaching to a case, and the Noctua Owl badge.

In the Intel bag are all the parts needed to mount up to all the Intel LGA sockets.

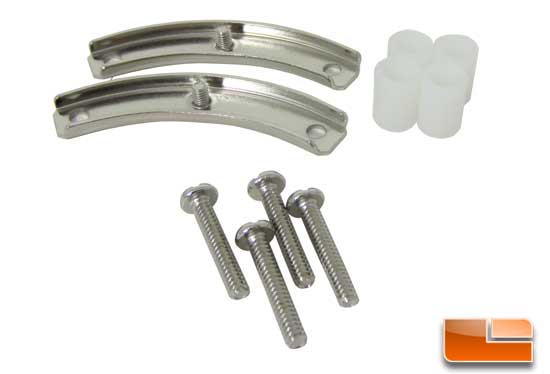
Also included in the Intel bag is a set of mounting studs for ITX motherboards that may have components on the back side of the socket that would prevent the standard backing plate from installing properly. In the image is the standard stud (left) for use with the backing plate. The stud on the right is the optional use stud for ITX motherboards.

The AMD parts bag has all that is needed to mount up to AM2/3 and FM1 sockets.

I will be installing the NH-L12 on our Intel LGA2011 test system. The first step is to install the mount posts to the socket and then the cross bars.

The included driver was more than long enough to reach the mounting screws. The clearance holes in the cooling fins allowed more than enough room.

I first installed the cooler so the heatpipes would run front to back. The cooler covered all the RAM slots on the front side of the board.

It also covered two on the backside, preventing any RAM (except for low profile) to be installed.

So I turned the NH-L12 to where the heatpipes run up/down. This orientation allowed for all RAM slots to be used.

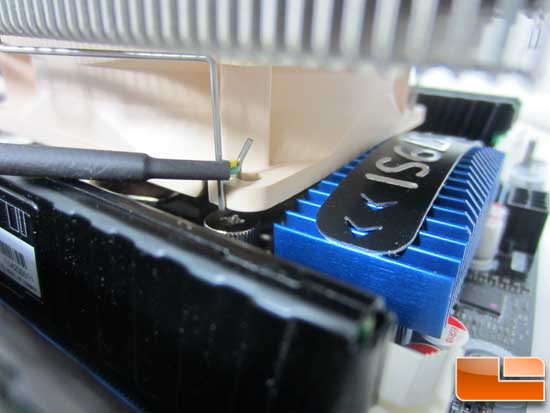
I then installed the lower 92mm fan; I had to remove my RAM first to slide the fan in from the side. This will definitely be an out of case cooler installation. On the top side there was very little room between the fan body and the heatsink on the Intel DX79SI motherboard.

On the bottom side of the socket the heatpipes cleared. If you have large heatsinks around the socket you will want to do some measuring to see where they fall.

With the top 120mm fan installed, it is time to put it all back in the case and do some testing.

Comments are closed.