MSI Z270 XPower Gaming Titanium Motherboard Review
MSI Z270 XPower Gaming Titanium Overview
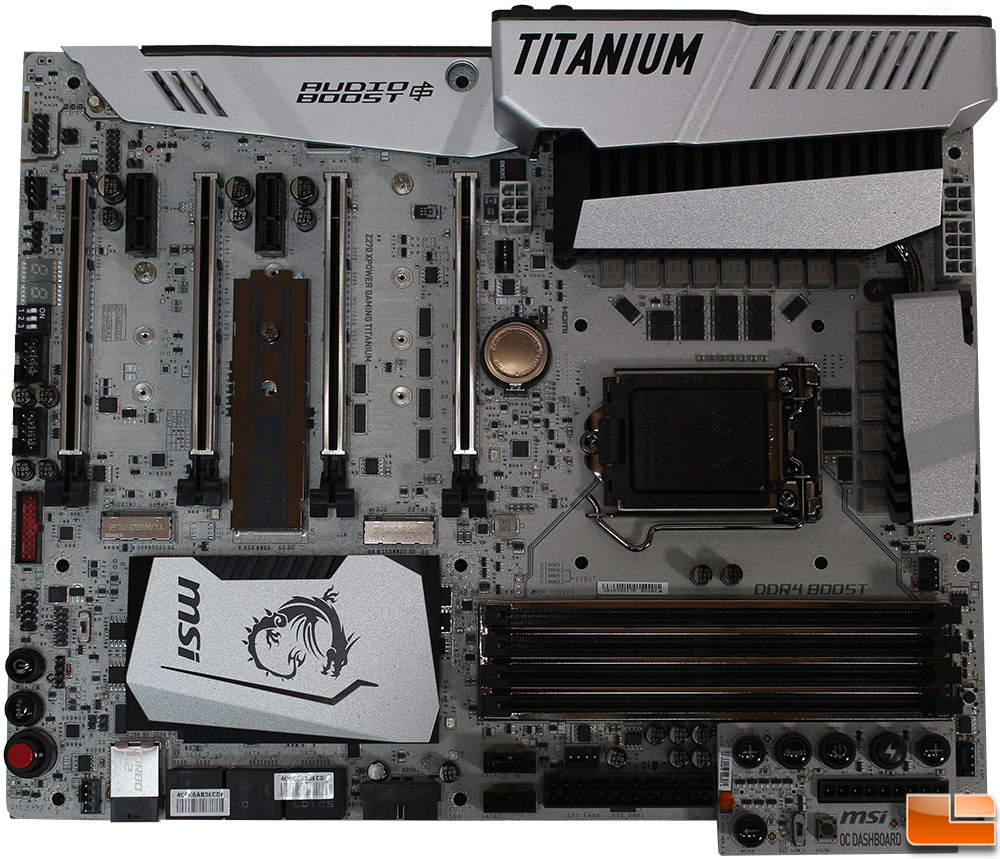
The MSI Z270 XPower Gaming Titanium, is a standard ATX motherboard, with a small extension for the OC Dashboard. Like most flagship motherboards, it includes a wide range of features on the motherboard, M.2 shield, three M.2, multiple overclocking features, two USB 3.1 Gen 1 headers, and more. Overall, the motherboard has a “Titanium” look to it with a silver finish on the PCB, and metal shielding on the various heatsinks and I/O cover.

Taking a quick look at the rear I/O cluster, we find a slightly modified layout of seven individual clusters. The first cluster includes a legacy PS/2 port and two USB 2.0 ports. Next comes an external Clear CMOS button and a single USB 2.0 port that is also used for the BIOS Flashback+ function. The next two clusters are nearly identical, each cluster includes an Ethernet port and two USB 3.1 Gen 1 ports. What makes them different is the left Ethernet port is powered by Intel I211 Gigabit, where the one on the right is Intel I219-V Gigabit, they can work together with Intel LAN Teaming Technology. In addition, the two USB 3.1 Gen 1 ports with the Intel I219-V Ethernet port is also VR-Ready. The Video out options include Display Port and HDMI. Then we find the USB 3.1 Gen 2, Type-A and Type-C ports. Finally the 7.1 audio cluster includes the standard 5 audio jacks, and one Optical S/PDIF port, which is powered by the Realtek ALC1220 CODEC and supported with Audio Boost 4 and Nahimic 2.

Along the edge is the standard auxillary power connector(s). MSI has included a 4-pin and an 8-pin connector, for most users, you can connect either one and be just fine. If you need more power, connect the other connector. Around the CPU socket is the 16-phase power delivery design, with some large heatsinks covering VRM and Mosfets.
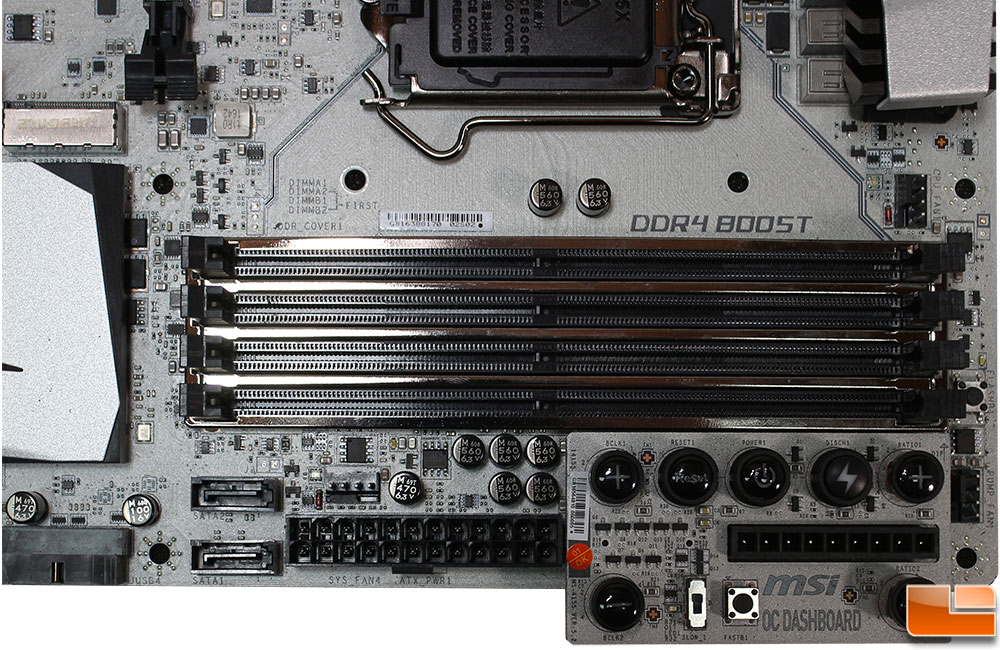
Here we find the four DIMM slots, that supports up to 64GB of dual-channel DDR4 memory with speeds over 4000MHz; in addition it supports Intel XMP settings if you prefer to use those. The DDR4 slots has the MSI Steel Armor in place, which is a single piece of metal that provides EMI-shielding, and increases the strength of the DDR4 slots with added solder points on the back of the motherboard. Above the DDR4 slots we find CPU_FAN1, while to the lower right we find the PUMP_FAN1. SYS_FAN4 is found just above the 24-pin ATX power cable. While two SATA 6Gb/s connections are found to the left of the ATX power connector, controlled by ASMedia ASM1061. In the lower right corner, we find an add-on PCB that is MSI’s OC Dashboard; this is an external overclocking control module. Here we find buttons to adjust your base clock by turning the Multiplier or BCLK Up or Down. Switch between the two UEFI chips at a press of a button, and switch into Slow Mode to temporarily decrease clock speed. You can clear the CMOS and do a complete discharge of the CMOS options. If you want, MSI has included an extension cable to move the OC Dashboard away from the motherboard to a more convienent location. Finally, there are nine voltage check points to monitor the voltages while overclocking. This board is made for overclocking in every way possible.
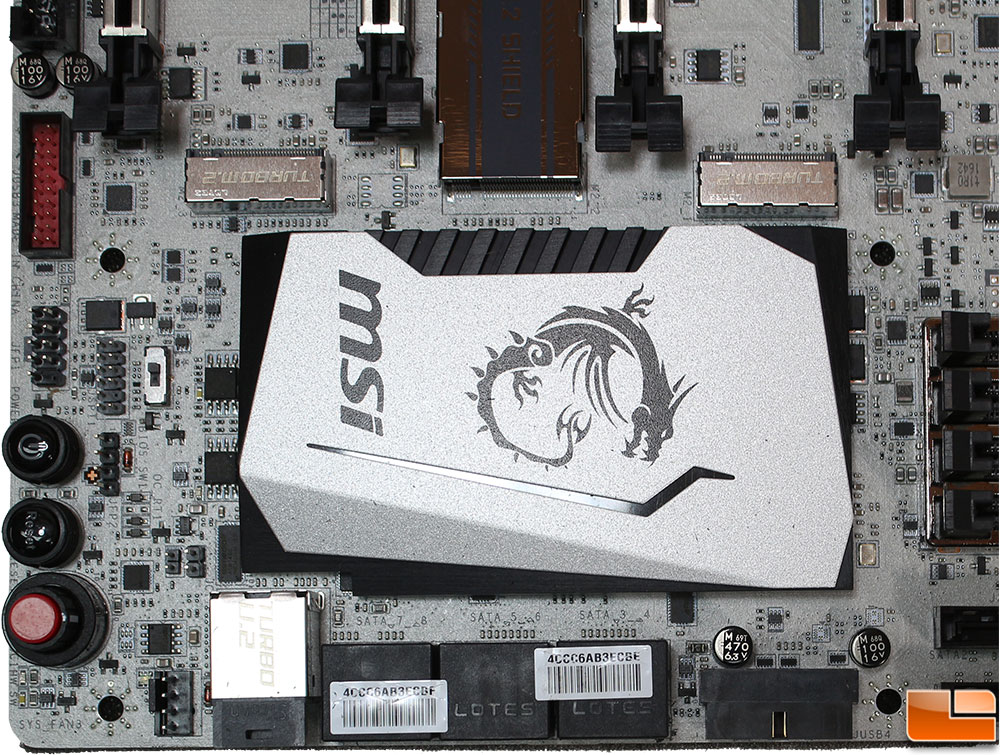
In the corner of the motherboard with the Intel Z270 chipset, we find a large heatsink with a nice silver cover on it, featuring the MSI Dragon logo. In the corner we find a pair of buttons; power and reset buttons along with the Game Boost dial. Next to the U.2 connector is the SYS_FAN3 header. Surrounding the power button are the front panel connectors. There is also a UEFI selector switch, allowing you to choose the UEFI chip you want to boot from A (default) or B.
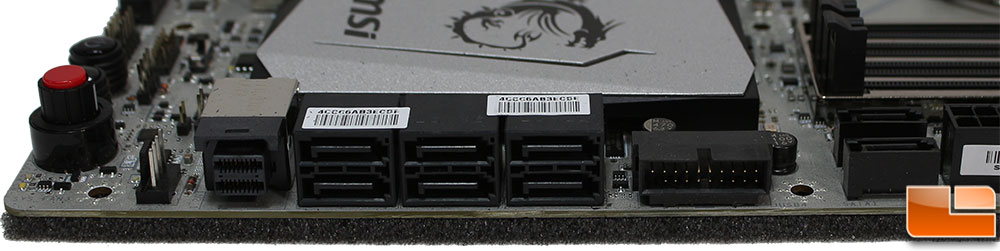
The majority of the storage device connections are horizontal to the motherboard, so they face off the edge of the motherboard. This is pretty standard, however one of the USB 3.0 headers is also in this orientation. I don’t mind that, however the USB 3.0 header cable is fairly stiff in most cases, and could be rather difficult to manipulate for a secure connection. The other connections that are horizontal to the motherboard are the U.2 connection, and six of the SATA 6Gb/s connections controlled by the Intel Z270 chipset, the other two SATA 6Gb/s connections are to the right of the USB 3.0 header sitting vertically to the motherboard.

Turning towards the PCIe slots, we find there are a total of four x16 slots, and two x1 slots. Each of the x16 slots are PCIe Gen 3, protected by MSI Steel Armor, and supports up to 4-way CrossFire or 2-way SLI. Nestled between the x16 slots are the three M.2 slots which supports SATA or PCIe devices, and Intel Optane in all three slots. A couple of additional things to point out, next to the first PCIe x16 slot is an additional 6-pin power for multi gpu solutions. Along the left edge, we find the usual headers which include Front Audio, SysFan_2, LED Strip, debug LED code reader, PCIe shut-off switch, two internal USB 2.0 headers, and another USB 3.1 Gen 1 header.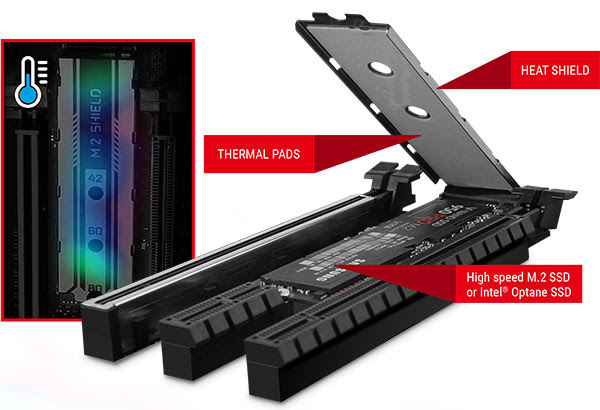
MSI acknowledges the overheating potential on M.2 drives, so they have developed a M.2 Shield, that should help pull some heat away from the drive. There is only one on the Z270 XPower Gaming Titanium, on the middle M.2 slot; for the price of the Z270 XPower Gaming Titanium, I would have preferred MSI include the M.2 Shield on all three M.2 slots. There is a protective film covering the thermal pad, so you’ll have to remove that. Then you can install your M.2 drive and secure it with the screw with the shield.