MSI Big Bang XPower II Motherboard Review
MSI Big Bang XPower II Motherbaord Layout
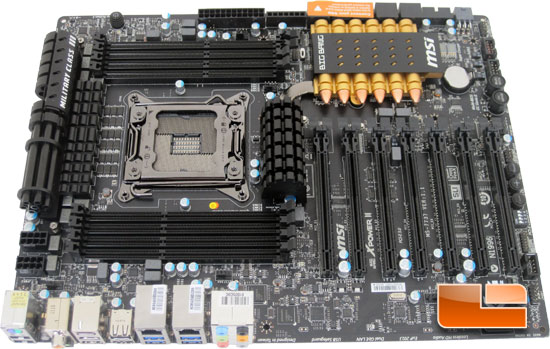
The MSI Big Bang XPower II for the most part is a very sharp looking motherboard. The heatsink designs are a little on the excessive side. While some may really like the look of the weaponized heatsinks, I’m personally not a fan. Would that stop me from buying the MSI Big Bang XPower II, probably not. Especially if it has the performance to back it up. We’ll get to that shortly, for now let’s take a closer look at the Big Bang XPower II.
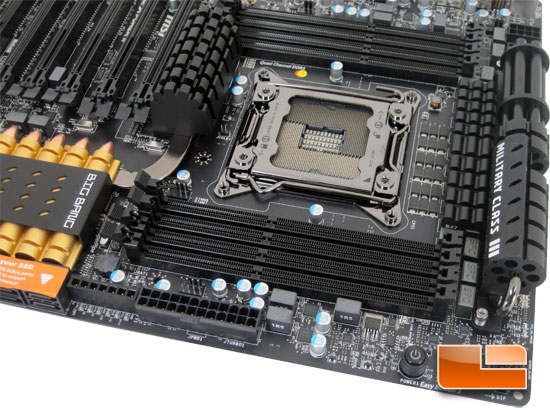
Taking a look at the first corner of the MSI Big Bang XPower II motherboard, we can first spot the typical 24 pin motherboard power, and the camera is zoomed out enough that we can see all eight of the DIMM slots. The MSI Big Bang XPower II will support DIMM’s up to 2400MHz and a total of 128GB of memory maximum! To the left of the 24pin motherboard power is the V-Check points. Among the V-Check points we can check the CPU vCore, CPU IO, CPU SA, DDR A/B/C/D, and the PCH 1P1V. MSI has also placed the Easy Button for the system power here. This is a good location for the power button, but I wish they had placed the reset button here as well.
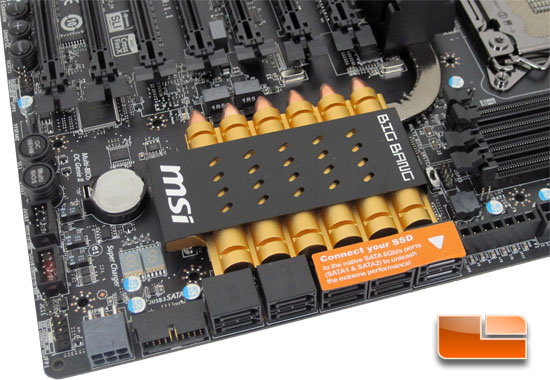
The MSI Big Bang XPower II has a grand total of ten SATA ports, six of which are SATA III 6Gbps and for are SATA II 3Gbps. The pair furthest on the right side are SATA III 6Gbps controlled by the Intel X79 chipset while the four SATA III 6Gbps on the left are controlled by ASMedia ASM1061 SATA III controllers. To the left of the SATA ports is the internal header for the front panel SuperSpeed USB 3.0 which is controlled by the NEC D720200 USB 3.0 controller. Letting our eyes stray up the left edge of the MSI Big Bang XPower II we can see the front panel header, a pair of internal USB 2.0 headers, the Multi BIOS switch, OC Genie button, followed by a 4pin system fan header. The heatsink that keeps the Intel X79 chipset cool is supposed to resemble ammunition, in reality they look much more like crayons than anything else.
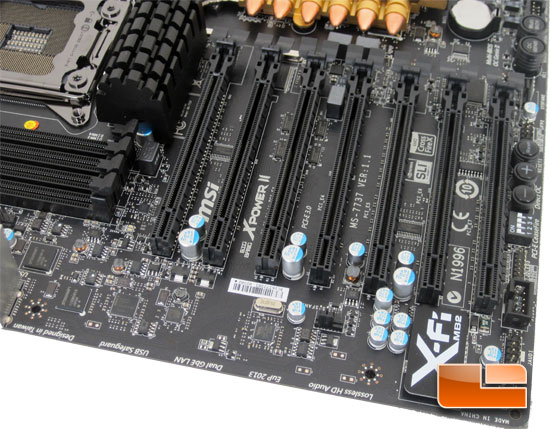
The MSI Big Bang XPower II features seven PCIe x16 slots. Four of which are PCIe Gen3 slots (1,3,5,and 7), while three of them are PCIe Gen2 slots(2,4,and 6). Picking up where we left off along the edge of the MSI Big Bang XPower II we can find the reset button and the direct OC buttons, PCI-E Ceasefire, internal Firewire header, and the front panel audio header. Along the leading edge of the MSI Big Bang XPower II we can see the large X-Fi MB2 logo which covers up the Realtek ALC892 High definition audio codec, a 4pin system fan header, VIA VT6315 IEEE1394 (Firewire) chip, Intel 82579V and 82574L Gigabit LAN controllers, and the pair of NEC D720200 SuperSpeed USB 3.0 controllers for the I/O panel.
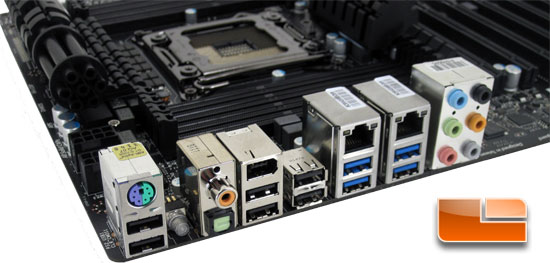
Speaking of the I/O panel, the MSI Big Bang XPower II has a fully stocked I/O panel. The Big Bang XPower II has a total of 10 USB ports, six USB 2.0 and four SuperSpeed USB 3.0 (blue), a single PS/2 port for either a mouse or keyboard, optical and coaxial SPDIF out, Firewire, a pair of Intel controlled Gigabit RJ45 LAN jacks, and the standard six audio jacks. Barely visible between the first two USB 2.0 ports and the SPDIF ports is a clear CMOS button.
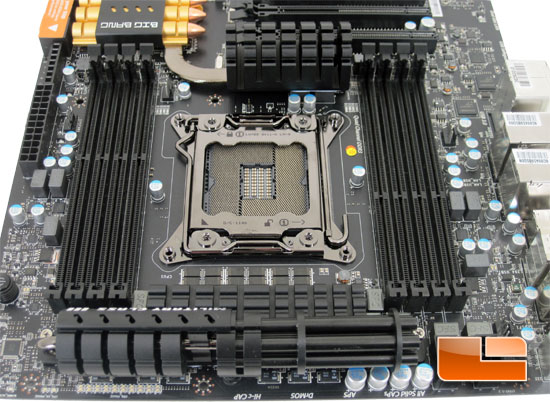
Just to the left of the Minigun heatsink is a pair of 8pin CPU power plugs. Unless you’re going with extreme cooling you will only need to use the one closest to the heatsink assemble. On the left side under the heatsink there is a series of LED’s that will display the number of phases that your second generation Intel Core i7 processor is currently using. If you aren’t familiar with the Intel LGA 2011 socket, it’s a little bit different than it’s predecessors. The previous sockets have all been a single lever to lock the CPU retention bracket in place. The LGA2011 socket has a lever on either side that need to be locked down in the correct order or you wont be able to lock the second one down. Looking at the socket as orientated the left side needs to be done first as will interfere with the other side if done in the wrong order.

Comments are closed.