How to Install Vista on the ASUS P6T Deluxe with SAS RAID
Finishing the Vista Installation and Benchmarking

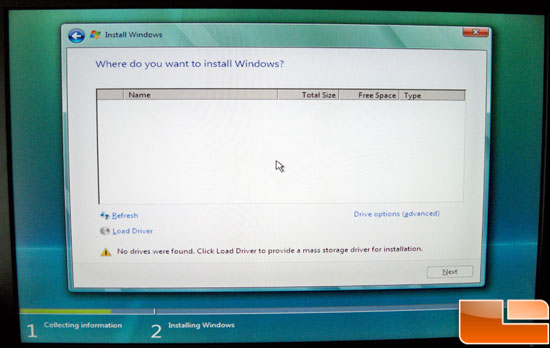
Boot from your Vista DVD and proceed through the agreements that Vista prompts you for, after a couple of clicks you’ll end up on the screen above. Notice at the bottom of the screen it says no drives were found. Click “Load Driver” and the Windows Installer will search any media you have connected to the computer.

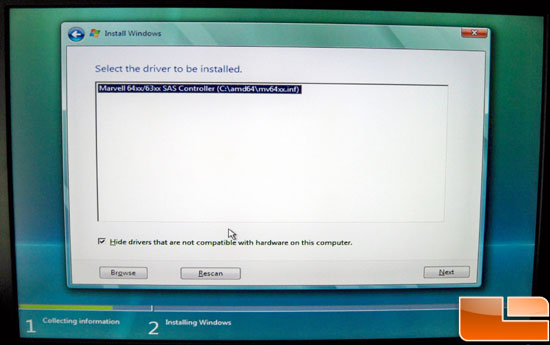
If you are using a USB drive (my recommendation) it will automatically find the driver for you. If you plan to use the driver CD you’ll need to put that in your tray and then hit the “Rescan” tab. Once you see the driver, click “Next.”

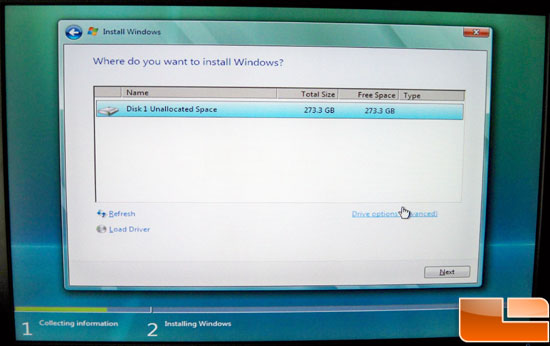
Windows will then load the driver and you’ll be back to the question of where you want to install Windows. There are a couple of options here, you can choose to partition the drive, or you can just choose “Next.” Once you hit Next, Windows will begin installation and there is nothing further you’ll need to do for your SAS RAID array. For those that installed the driver from the CD, you will be prompted put your Vista DVD back in. From this point on you can proceed with the installation like normal. If you need help with that check out our step-by-step guide here.

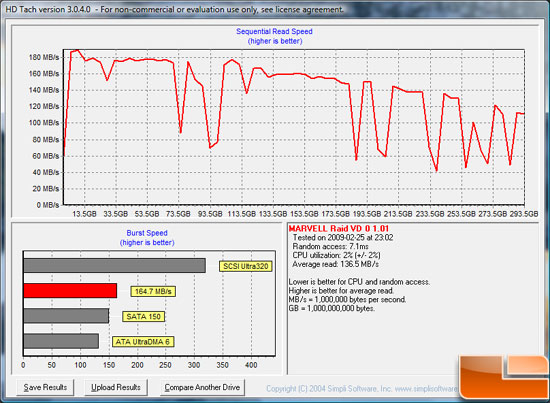
And with that, it pretty much wraps up our how-to. As you can see, performance from a pair of 10,000 rpm drives in RAID 0 offers very quick random access times and great sequential transfer rates! Now if we could just get our hands on some 15k rpm drives!

Comments are closed.