Google Chromecast Review – Easy Wireless Streaming
The Google Chromecast Revolution
When Google announced the Chromecast wireless streaming device it rocked the tech industry. For just $35 shipped, the Google Chromecast will turn any ‘dumb’ HDTV into a ‘smart’ TV that is capable of streaming media from Netflix and YouTube. You can also send entire tabs from the Chrome browser on Macs and PCs, which means you can basically put any site or service on TV with just the click of a button. This tiny little HDMI dongle offers a painless way to wirelessly transfer your favorite content from your phone, tablet or laptop straight to your TV. The best part is that not only does it work on your Android tablets and smartphones, but it also works on the Apple iPhone, iPad and even PCs!
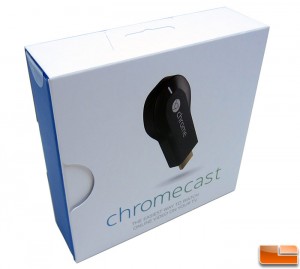
Sure, Roku already has a Chromecast-like streaming dongle called the Roku Streaming Stick, but while it has more apps it is more costly at $83.99 shipped. Clearly Roku missed an opportunity as the Google Chromecast is the talk around town and the $35 price point doesn’t have anyone complaining that it is too expensive. It was also nice that Google also included a code for three months of Netflix, which essentially brought the price down to just $11 by the time you factor in the Netflix savings.
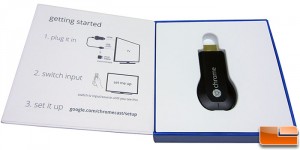 Inside the retail packaging you’ll instantly see the directions and there are just three simple steps to get started. You just need to plug the HDMI dongle into an HDTV, switch to that HDMI input and then go to www.google.com/chromecast/setup to begin the setup process to connect it to your existing local wireless (Wi-Fi) network. Besides plugging in the Chromecast the first time, you shouldn’t ever need to touch it again. Everything else from this point on is controlled with your computer, smartphone, or tablet. There’s no normal remote control or need to connect directly to the Chromecast.
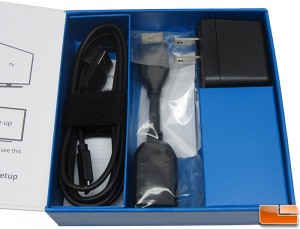 Underneath the Chromecast you’ll find the accessory bundle.
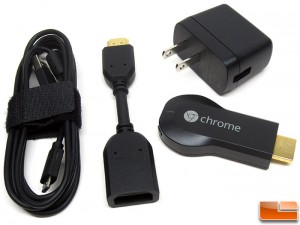
Besides the Chromecast itself, you get a micro-USB-to-USB cable, a USB power adapter for a wall outlet, and an a HDMI extender. The HDMI extender can be very useful if the Chromecast is a little too thick to fit against other HDMI devices or the casing of your HDTV housing.
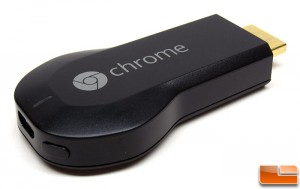
The Chromecast looks like a USB flash drive and is only 72(L) x 35(W) x 12(H) mm in size with a weight of 34 grams. At one end of the youll find a gold plated HDMI 1.4 connector and at the other end a micro-USB port, a reset button, and a white status indicator LED.
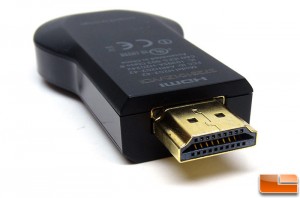
We didn’t feel comfortable cracking the Chromecast open, but features an AzureWave combo Wi-Fi controller, low-power Marvell ‘Armada’ DE3005 SoC, paired to 512MB of low-voltage RAM and 4GB of flash memory. The most interesting thing inside is the AzureWare chip as it is said to support 802.11 b/g/n, Bluetooth 3.0 and FM radio! Could a future firmware update enable Bluetooth and FM radio features? It should be noted that the Chromecast supports 2.4Ghz 802.11 b/g/n wireless support, so don’t go thinking this 1080p device will connect to your 5GHz band when you go to set it up for the first time. Rumor on the street is that the cost of the license to access the 5GHz band would have pushed the price of the Chromecast into the $40+ range, so this was likely due to keep costs down.
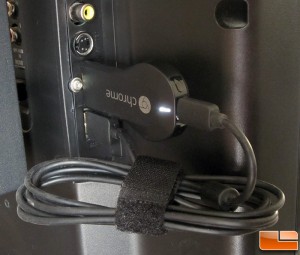
Installing the Google Chromecast onto your HDTV is very easy as you just need to plug it into an open HDMI and USB port. Despite the fact that both HDMI and USB ports carry current, the Google Chromecast needs both power sources as it pulls more power than either one can deliver individually. HDMI 1.4 can only push 50mA, which isn’t much power to begin with when you consider all that is inside the Chromecast.
If you don’t happen to have an available USB port on your TV you can use the included power adapter and plug the USB cable into the wall adapter. As you can see from the image above, we connected our Chromecast to the side HDMI input on our Philips TV since there was a USB port directly below it. We were able to tuck the wires behind the HDTV so that none were visible from the front.
