Gigabyte Aorus AX370-Gaming 5 Motherboard Review
Aorus AX370-Gaming 5 Overview
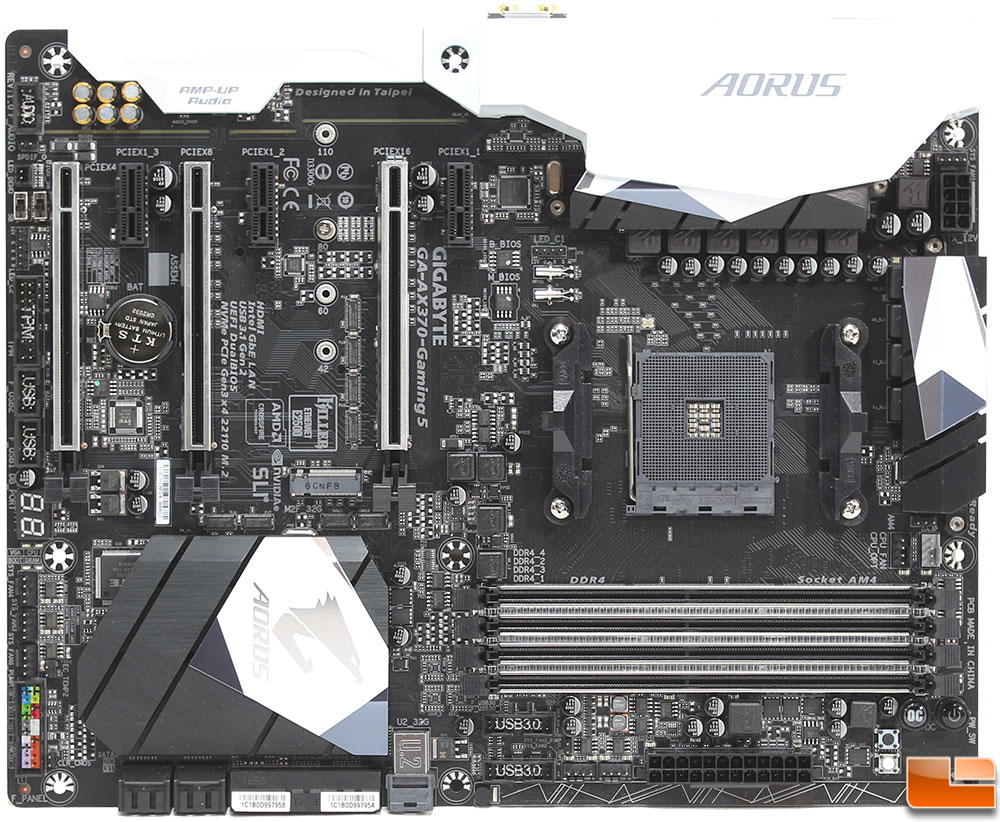
If you have been following Gigabyte’s Aorus Z270 motherboards, the Aorus AX370-Gaming 5 looks very familiar. With just a few small differences, it looks quite a bit like the Z270X-Gaming 7 motherboard. In fact, even the feature set is quite similar. This is good as now you don’t have to sacrifice the latest features for a different CPU. Both motherboards support U.2 NVMe, M.2 NVMe, SATA Express and SATA 6Gb/s storage drives, DDR4 memory, RGB LED’s, the latest PCIe graphics cards and USB 3.1 Gen 2 Type-C. Let’s take a quick look around the motherboard to take a closer look at it.
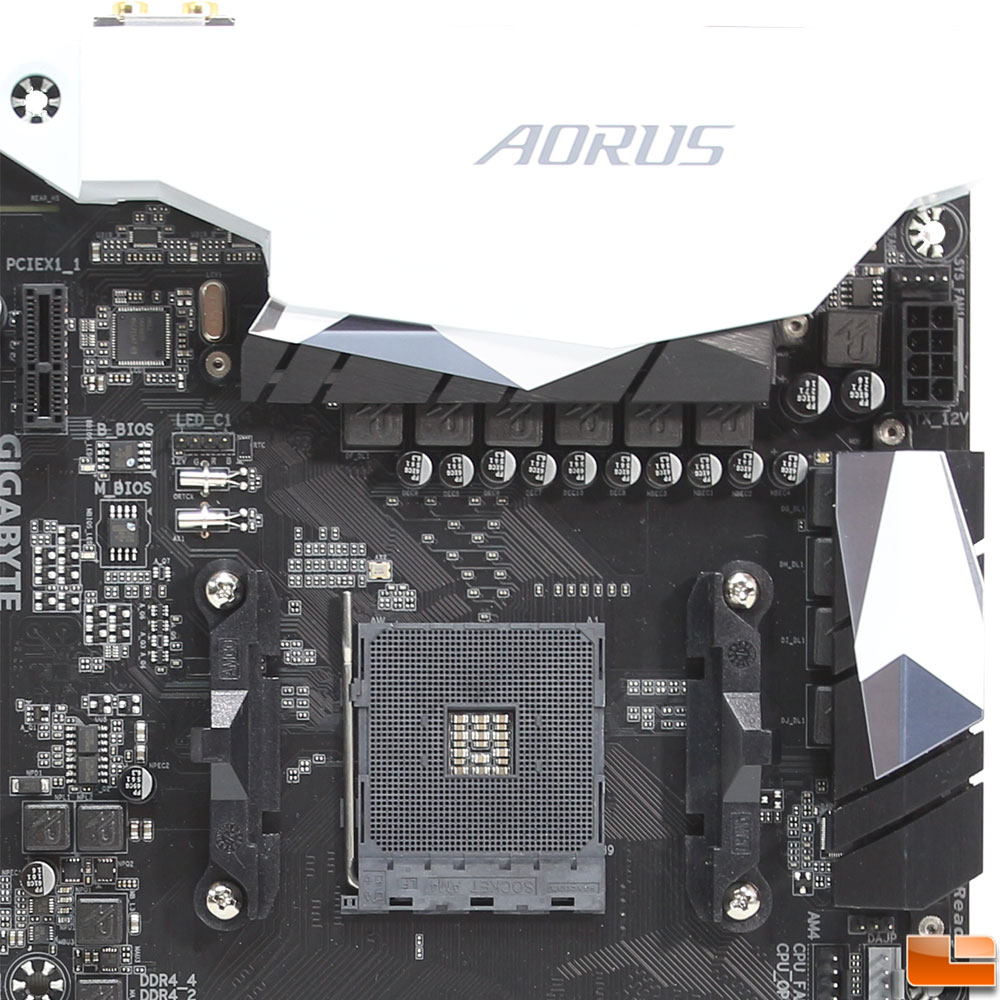
In the top right corner we find a large rear I/O plastic cover which partially covers the heatsink that covers the 6+4 phase power delivery controllers with PowlRstage IC’s which helps to distribute the heat. Along the right edge is the 8-pin AUX power connector, and a four pin fan header labeled SYS_FAN1. To the top left of the CPU socket is a LED_C1 header, which is one of two RGB LED strip headers, compatible with 5050 RGB LED strips.
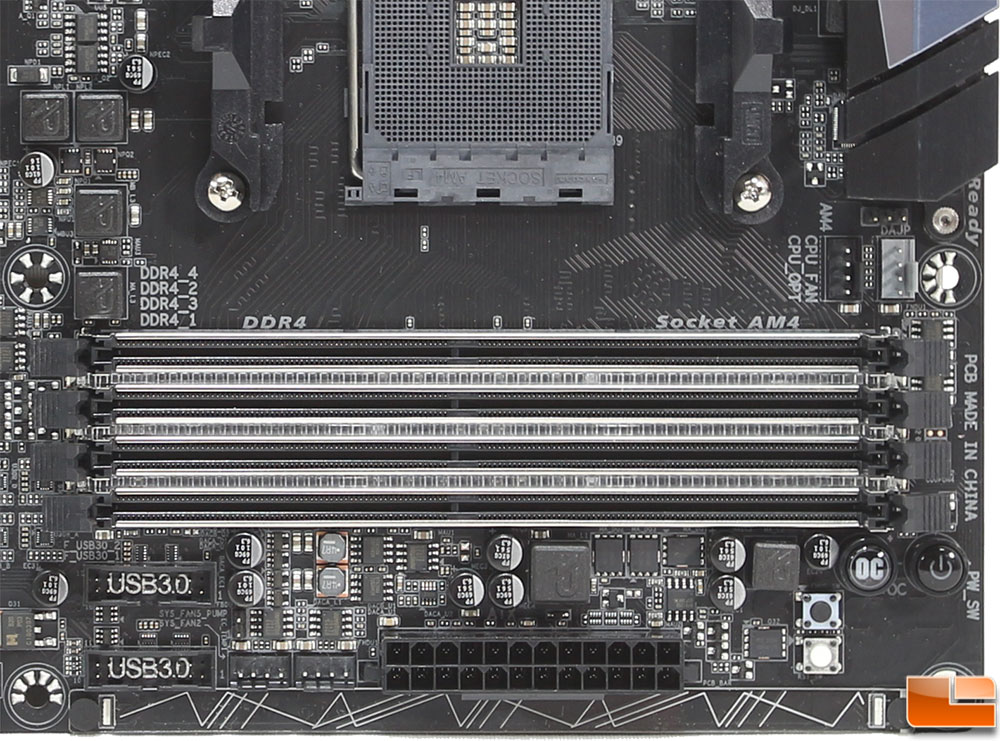
In the lower right corner of the motherboard, we find the typical four DDR4 memory slots, which will support up to 64GB of memory running up to 3200MHz in both ECC and non-ECC modules. Keep in mind that Ryzen is a whole new architecture, and memory compatibilty has been an issue since it’s release. Take a look at the memory compatibility list before purchasing memory for any Ryzen based system.
Each of the four DDR4 memory slots are reinforced with Gigabyte’s Steel Armor plating, which is a single piece of stainless steel to provide extra support to the DDR4 slots and provides additional protection against ESD interference. Between the memory slots are also RGB LED strips to light up the memory. To the top right of the DDR4 slots are two fan headers, CPU_Fan (White) and CPU_Opt (Black). Two more fan headers are located below the memory slots to the left of the 24-pin ATX power connector; these are SYS_FAN2 and SYS_FAN5_PUMP. To the left of these fan headers are two USB 3.1 Gen 1 internal headers, which are both USB DAC-UP2 enabled, allowing for cleaner power delivery to the USB ports. For those that like on-board power/reset buttons, those are located in the lower right corner. The four buttons included is a large Power and Overclock button, a small black CMOS clear button and a white reset button. Along the bottom edge of the motherboard is Gigabyte’s RGB LED accent bar, which can be changed for a different look. While Gigabyte doesn’t sell different accent bars, they do provide the overlay so if you have access to a 3D printer you can design your own; you can download the overlay file here.
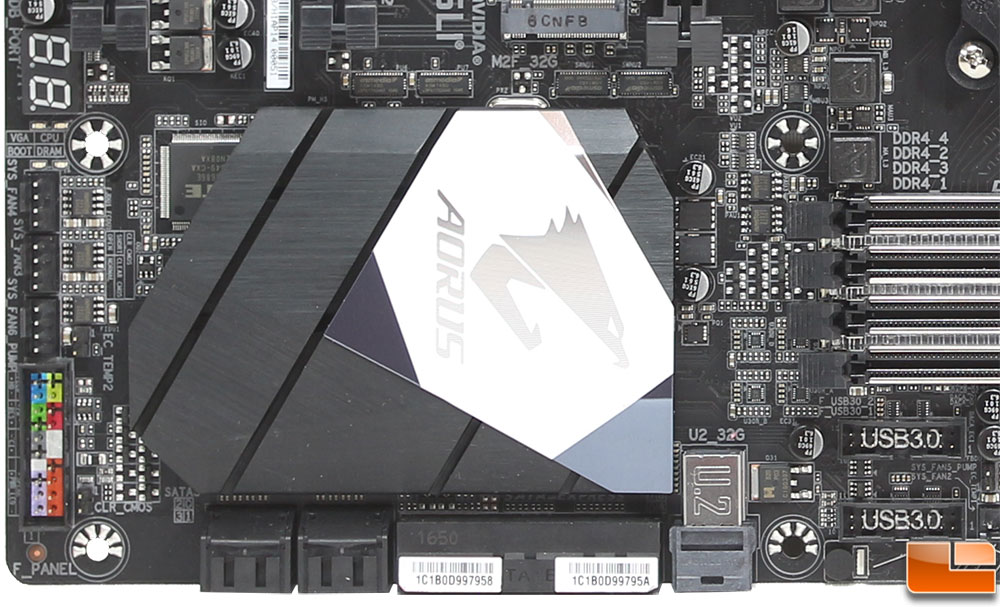
Moving along to the bottom left corner of the motherboard, we find the AX370 chipset has a rather large passive heatsink. Below the heatsink (in this picture at least) is the normal storage drive connections. Along the left edge, is the front panel header connectors, three 4-pin fan headers (SYS_FAN4, SYS_FAN3, SYS_FAN6_PUMP). Then we have the large two digital debug LED. However, between the debug LED and the fan headers are four tiny LED’s which light up to provide an idea where it’s at in the boot stage, these four LED’s represent the CPU, DRAM, VGA, and Boot stages.
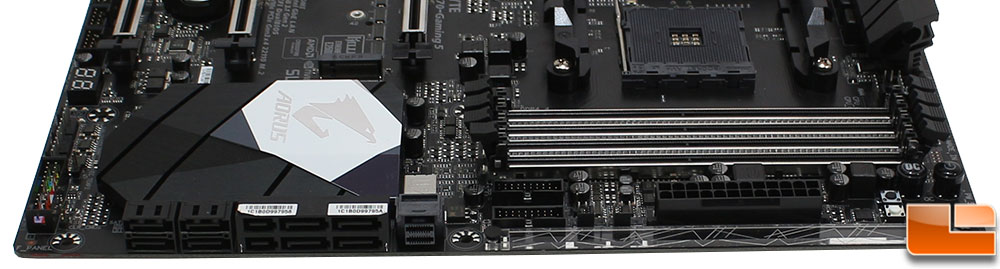
The storage drive connections are horizontal to the motherboard, which is both a positive and a negative. Usually in this position it’s much easier to make the connections as you don’t have to worry about graphics cards potentially covering the ports. However depending on your case some of the connections can get a little difficult to plug into; it’s a Catch-22 situation. Gigabyte has provided a large number of connections, which includes a cluster of 4 SATA 6Gb/s connections, then a pair of SATA Express, or four more SATA 6Gb/s connections. Lastly, we have an onboard NVMe PCIe Gen3x4 U.2 connector. Currently there aren’t many options for U.2 drives, the Intel 750 is one option.
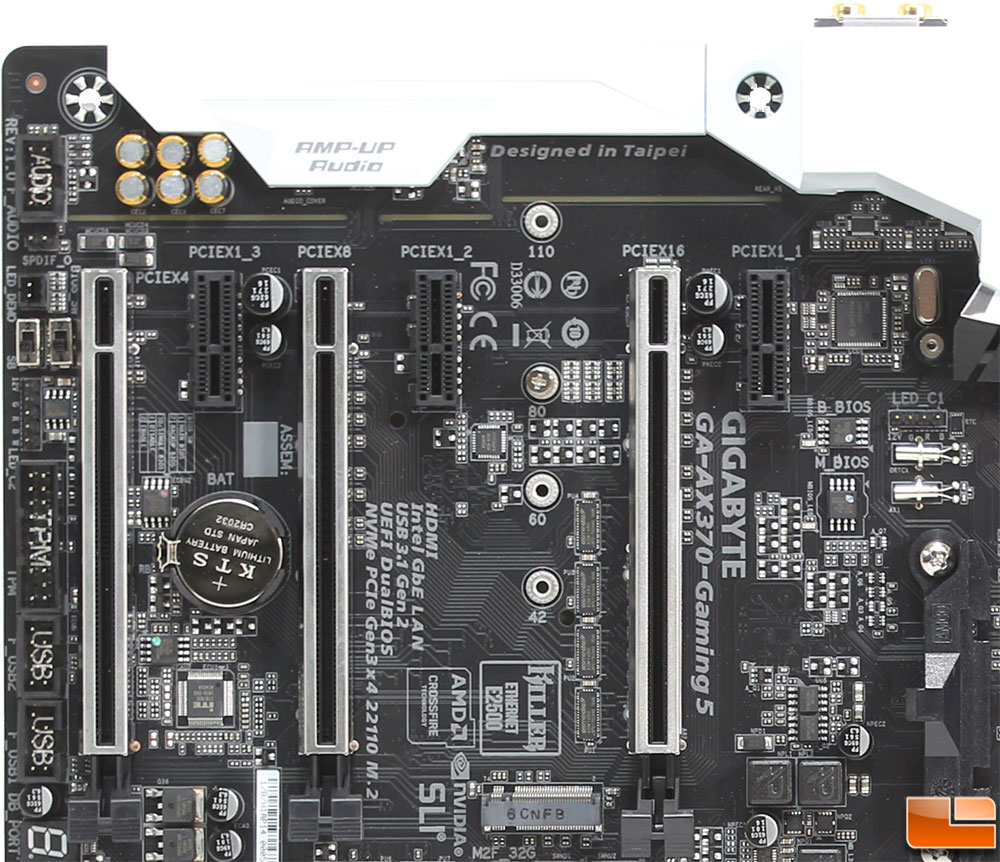
The main feature of the last section is the PCIe slots. Here we find three PCIe x16 and three PCIe x1 slots. Individually, the PCIe x16 slots run at x16 (PCIEX16), x8 (PCIEX8), and x4 (PCIEX4). However if you use both the PCIEX16 and PCIEX8 slots then they both run at x8; and conform to the PCI Express 3.0 specification. PCIEX4, shares it’s bandwith with all three of the PCIe x1 slots, which will slow the PCIEX4 slot to x2 if you use the PCIe x1 slots; the PCIEX4 and PCIe x1 slots all conform to PCI Express 2.0. Along the left edge of the motherboard we find two USB 2.0 headers, a TPM header, RGB LED strip header, dual BIOS switches, and the front audio header. Situated between the main PCIEX16 and PCIEX1_2 slot is the M.2 drive slot. Here it supports M-key M.2 drive, and all of the major lengths (2242/2260/2280/22110) for both SATA and PCIex4 drives. Unfortunately, if you happen to be lucky enough to have a U.2 drive, the M.2 drive slot becomes disabled.
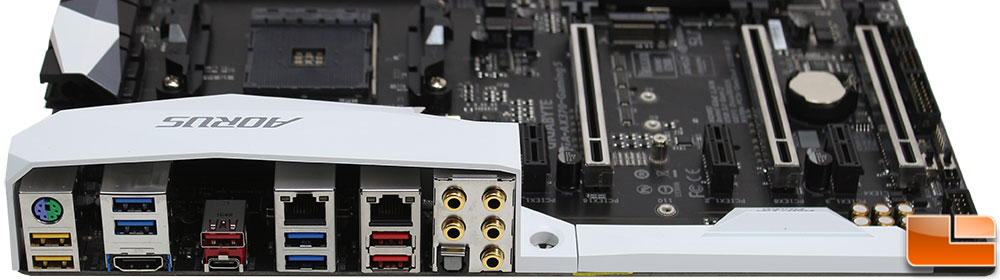
Turning our attention to the rear I/O cluster we find the usual suspects here. Starting on the far left, is a PS/2 Keyboard/Mouse combo port, and two yellow USB 3.1 Gen 1 ports, which are compatible with USB DAC’s. Next are two common blue USB 3.1 Gen 1 ports, and an HDMI port which supports video up to 4096×2160@24Hz and 8 channel LPCM audio. The small red cluster is the USB 3.1 Gen 2 cluster, with a Type-A and a Type-C port. The two Gigabit Ethernet clusters are nearly identical with a RJ-45 port, and two USB 3.1 Gen 1 ports; the difference between the two Gigabit Ethernet ports is that one is supported by an Intel GbE chip, while the other is the Rivet Networks Killer E2500. Finally the audio cluster includes the common five 3.5mm plugs and one Optical S/PDIF connector.
Now that we have seen what the Gigabyte Aorus AX370-Gaming 5 motherboard has to offer, let’s take a quick look at the test setup before getting to doing any testing.