EVGA Z77 FTW Intel Z77 Motherboard Review
EVGA Z77 FTW Motherboard Layout
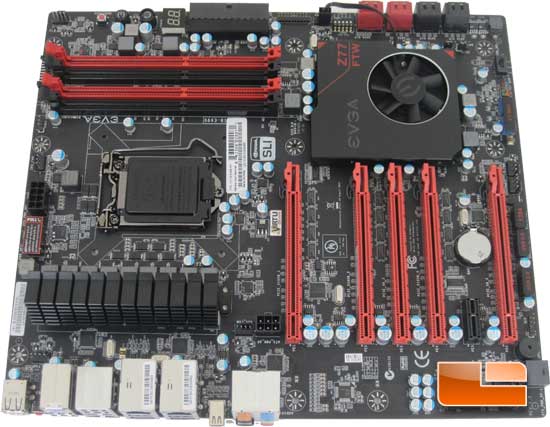
The EVGA Z77 FTW has a very good look to it. While it may be slightly over done these days, the red and black color scheme works very well and will look good in just about all PC cases (there’s always an exception though). If you can’t tell from the picture the EVGA Z77 FTW is larger than a standard ATX motherboard. A standard ATX motherboard measures 12 in (305 mm)x9.6 in (244 mm)(Width x Depth) and the EVGA Z77 FTW measures 12 in (305 mm)x10.375 (263. 5 mm).
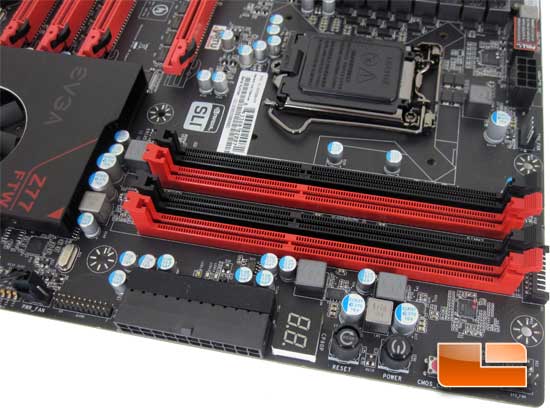
Starting out looking at the DIMM slots, EVGA has the Z77 FTW listed as supporting 2133MHz+ memory modules on their website. Though their BIOS tells us a different tale, we can set the memory multiplier up to 3000MHz! Along the leading edge of the EVGA Z77 FTW we can find a 4pin system fan header, a clear CMOS button, power and reset buttons, a Debug LED that also doubles as a CPU temperature display, 24pin motherboard power,
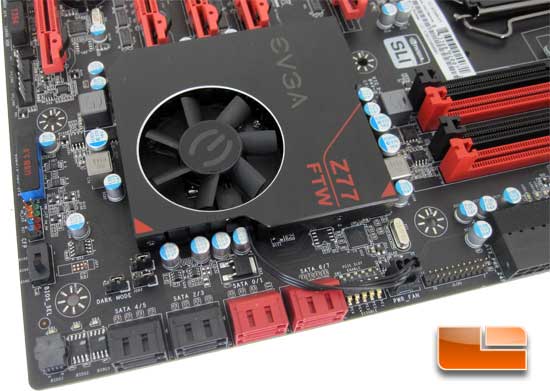
Rotating the EVGA Z77 FTW around, we can see that we have access to eight SATA ports, the four SATA ports on the left are the Intel Z77 SATA II 3Gbps ports, the next pair of red SATA ports are also part of the Intel Z77 chipset and are capable of SATA III 6Gbps. The final set of SATA ports are also rated for SATA III 6Gbps and are controlled by a Marvell 9182 SATA III 6Gbps controller. Just above the first set of SATA ports is a jumper for Dark Mode. The Dark Mode jumper will disable all of the LED’s on the EVGA Z77 FTW. If you like the EVGA Z77 FTW, but aren’t a fan of LED’s on a motherboard you can disable them! Immediately to the left of the SATA ports is our three separate BIOS chips, two are soldered in while BIOS 1 chip looks to be interchangeable. Moving just above the BIOS 1 chip is the selector switch that will allow you to change which BIOS you are using. Above the BIOS switch, is the pinout for the front panel LED’s and switches, followed by the internal SuperSpeed USB 3.0 header. If you watched the video on the first page, you may remember them mentioning that the fan on the heatsink above is nice and quiet. I won’t argue this, unless you decide to crank up the speed manually, then it is easily noticeable.
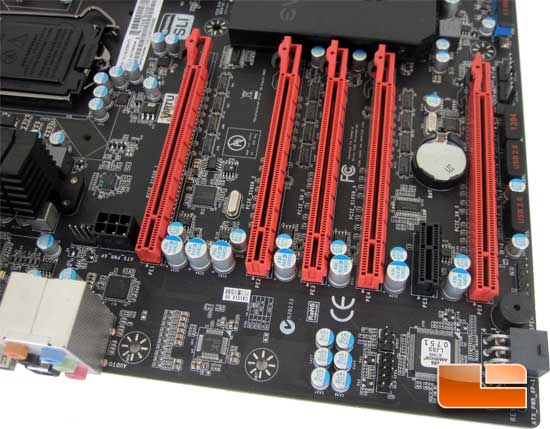
Spinning the EVGA Z77 FTW around once again and picking up where we left off, we can see a pair of 4pin system fan headers, internal IEEE 1394 (firewire), a pair of internal USB 2.0 headers, onboard system speaker, and a 6pin PCIe power. Much like the 24pin motherboard power above, EVGA has placed this 6pin PCIe plug on a right angle to the board to help with cable management. Rounding the corner of the EVGA Z77 FTW we can see the AMIBIOS LJ53 chip, front panel audio and SPDIF out headers, and teh Realtek ALC898 High Definition Audio Codec. The EVGA Z77 FTW features five PCIe x16 slots and can support up to 4way SLI and CrossFireX. The Intel Z77 chipset doesn’t supply enough PCIe lanes to do this on its own, so EVGA impemented a PLX8747 which adds to the number of PCIe lanes for better multi GPU performance.
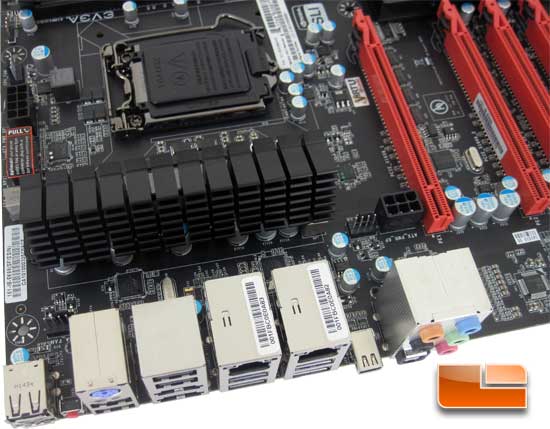
Taking a look at the final corner we can see the second of the PCIe 6pin power plugs. You can run either one when running multiple GPU’s. It all depends on which spot works better for your cable management. We can also see a pair of 4pin system fan headers, as well as the pair of 8pin CPU power plugs that can deliver 300 Watts of power to the CPU. Though you only need to run one of them under most circumstances.
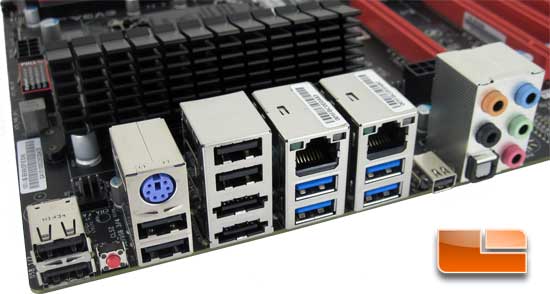
The EVGA Z77 FTW has a total of six USB 2.0 ports and four SuperSpeed USB 3.0 ports. Two of the SuperSpeed USB 3.0 ports are from the Intel Z77 chipset, these are the set on the right. The left set of USB 3.0 ports are controlled by an ASMedia ASM1042 SuperSpeed USB 3.0 controller. Above the USB 3.0 ports is a pair of Marvell Yukon 88E8059 Gigabit Ethernet controllers. Between the USB 3.0 ports and the audio out jacks we can find a mini DisplayPort which can be used to take advantage of the Intel HD 3000 graphics on either the Sandy Bridge processors or the Intel HD 4000 graphics on the Ivy Bridge processors like our Intel Core i7 3770K. Towards the left end of the I/O panel we can find the clear CMOS button, as well as a PS/2 keyboard port.

Comments are closed.