Cryorig A40 and A40 Ultimate AIO Hybrid Coolers Review
Cryorig A40 and A40 Ultimate AIO CPU Coolers Installation
| Intel LGA1150 Test Platform | |||||
|---|---|---|---|---|---|
| Component | Brand/Model | Live Pricing | |||
|
Processor |
Core I7-4790K | ||||
|
Motherboard |
MSI Z97 Gaming 5 | ||||
|
Memory |
Corsair Vengeance LP DDR3 1600MHz 16GB (2x8GB) | ||||
|
OS Drive |
Samsung EVO 850 250GB | ||||
|
Power Supply |
Corsair RM750 | ||||
|
Case |
CM MasterCase Pro 5 | ||||
|
Operating System |
Windows 10 64-Bit | ||||
Once the QF120 fans are mounted to the radiator, the unit looks really nice, with the white and black contrasting well. Installing the fans took just a couple of minutes and the radiator screw holes were all machined properly. The braided cables will certainly help keep cable management as clean as possible.
All testing was done on a test bed to ensure consistent results between all of the coolers. For testing, we attach the fans to the radiator in a push fashion using the included screws. Once the fans were secured to the radiator, we turned our attention to securing the pump to the motherboard.
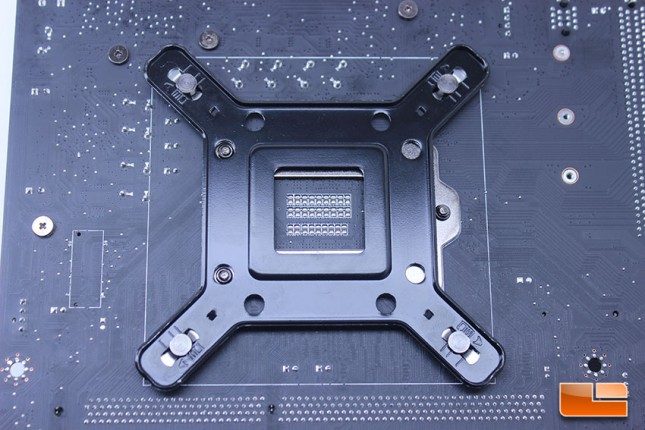 The posts were already slid into the proper position for the LGA 115x socket from the factory, which is smart and considerate of Cryorig, since these will be the most popular type of socket and the one their customers most likely own. Once we verified the posts were in the 115x position, the MultiSeg backplate fit perfectly on our MSI Z97 Gaming 5 motherboard. We didn’t have to change the Multi-Seg hardware between testing both coolers, as Cryorig uses the same mounting hardware with both the A40 and A40 Ultimate, of course. We cannot stress how solid and high quality this mounting hardware is and consider the Cryorig Multi-Seg to be one of the best mounting mechanisms in the industry.
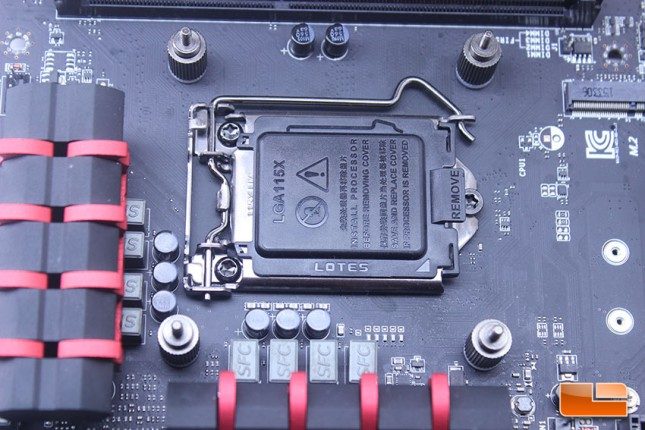 Once youve slid the backplate posts the motherboard, you secure it by hand-turning the securing screws onto the posts of the backplate. The screws have washers built into them, an excellent choice by Cryorig that eliminates user error, or the potential of losing washers. The hardware included is very high quality, with the screws turning into their threads securely, with no variances or issues with cross-threading.
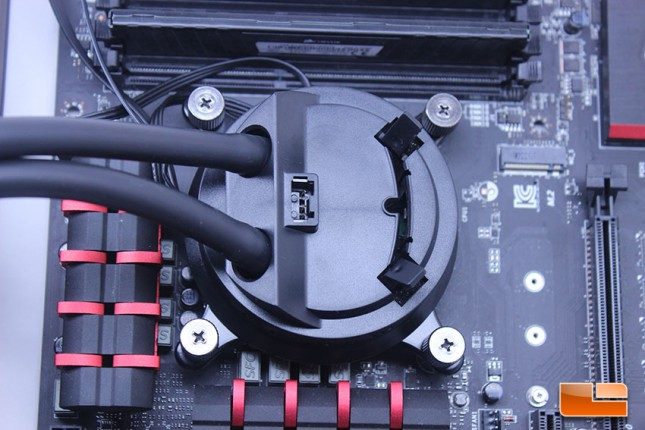 Once the MultiSeg backplate is installed and youve installed the CPU to the socket if it wasnt already in place, the next step is to attach the pump/block, creating a secure mount to the CPU. Once this has been done, you just need to even tighten thumbscrews on the four posts until the bock is completely secured and unable to move.
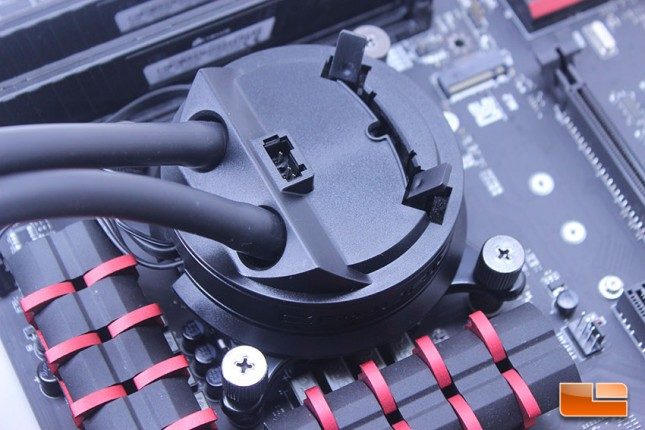 Though we haven’t had issues, even with large coolers like the Cryorig R1 Ultimate, there isn’t a great deal of clearance around the socket on the MSI Z97A-Gaming 5, as MSI is using large VRM heatsinks that are somewhat close to the socket. The Cryorig A40/A40 Ultimate pump has no issue fitting and there is still quite a bit of clearance between the VRM heatsinks and the pump unit.
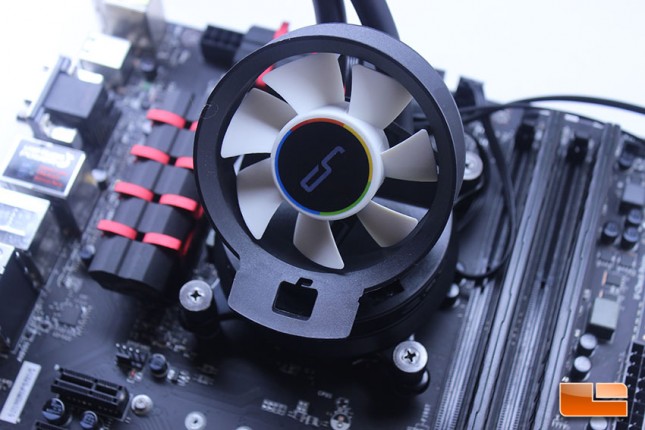
The installation process here is as simple as it gets for an AIO. The flexible tubing makes mounting easy in cases, but that wasn’t as a factor for us on our open test bed. We’ve praised the Cryorig Multi-Seg hardware plenty in the past and the same remains true to this day, the Multi-Seg hardware is simply the best in the industry and all of the mounting hardware included with the A40 and A40 Ultimate arrived in excellent condition, with properly machined screws and in separate bags for Intel and AMD users.
Next, we’ll check out the performance capabilities of the A40 and A40 Ultimate.
