Corsair Carbide 300R Mid-Tower Case Review
Corsair Carbide 300R Interior Impressions
Getting inside Corsair’s Carbide 300R is fairly easy. On the back end of the case, you simply remove the two thumb screws that hold the door to the chassis, and then pull it off. I did find in rare cases, that the door stuck a little more than it should. Everything was made easier by the grip points on the back end of the door, however.
Inside the 300R, you’ll find a very familiar layout, so let’s take a tour around it.
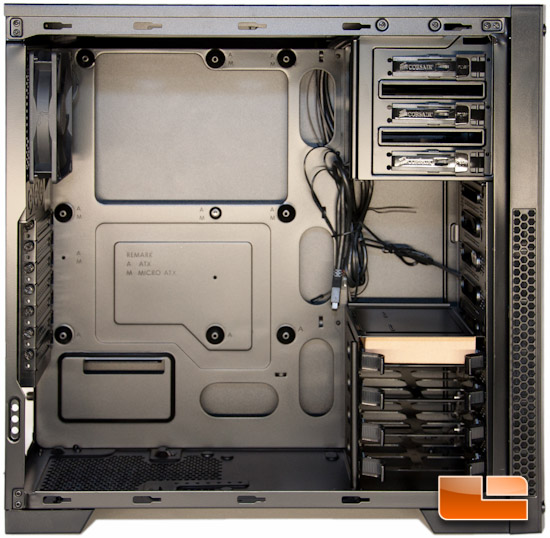
Starting with the HDD bay, you will find a place to mount four drives. The cages that hold the drives come out by simply pinching them at the ends, then tugging out. This is a nice and easy design, so I have no complaints here. The trays will fit both 3.5” and 2.5” drives; 3.5” drives will be completely tool-less, while 2.5” drives will require screws.
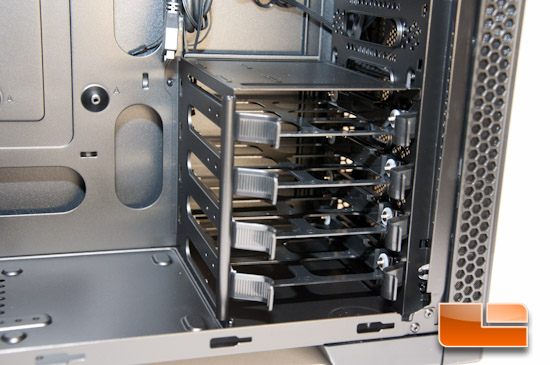
Moving up to the 5.25” drive bay, this is where you will have the ability to mount up to three ODDs or other devices that can fit here. When mounting a drive here, you just simply pop out the filler and slide the drive into place. Corsair has a nice tool-less option here, which makes mounting and removal an absolute snap!
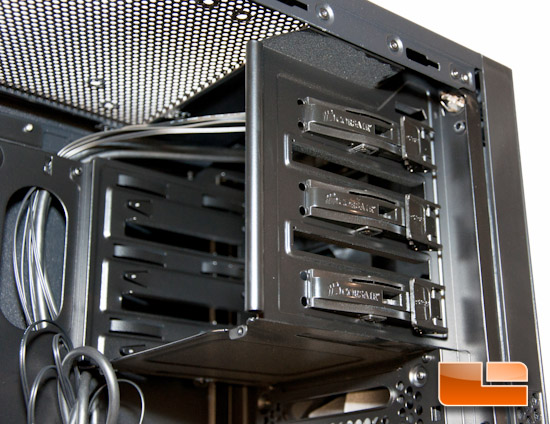
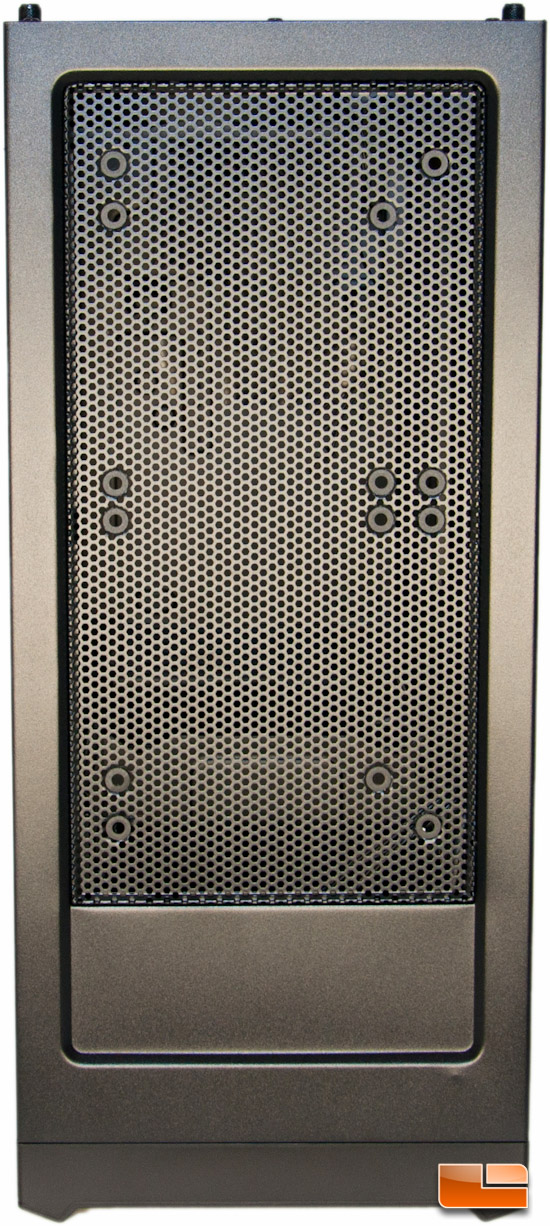
On the very top of the 300R is where either 120mm or 140mm fans can be mounted. Corsair has not included any here by default, so it’s up to you to supply these. Thankfully these were thought out well, as if you wanted to mount a 120mm or 240mm radiator, it will be offset from the motherboard tray enough to avoid interference with the motherboard and its components. The picture below is a view from the outside to understand how close you are to the outer edge.
Looking at the motherboard tray itself, you can’t help but notice the nice over-sized hole to get to the back of your motherboard. If you want to mount a large and heavy HSF or a water block, this will make installing the required bracket a piece of cake.
Corsair has integrated the standoffs into the motherboard tray. These are a neat idea, but it does limit the amount of motherboard compatibility to just ATX and Micro ATX. Corsair does label what is for what, which will help your more novice users. Also installed in the center-most position is an alignment stud. This should help make motherboard installation easier.
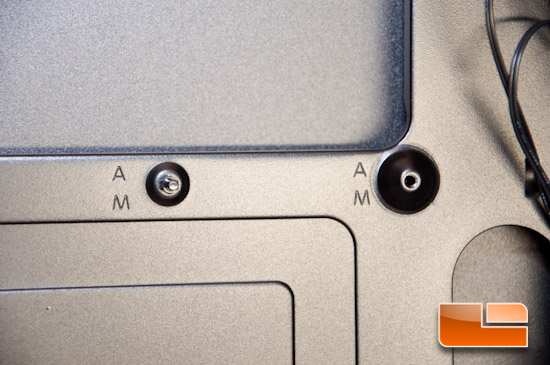
Right next to where the motherboard mounts, are four separate wire routing holes. These holes have rolled over steel rather than grommets, which I would have preferred to have seen rubber grommets here. These holes seem like they might be in a strange configuration or missing spots, so I’ll have to evaluate that more when I do the hardware installation.
On the back of the case is a single 120mm exhaust fan. These come pretty standard in cases today. This case also has room for 7 expansion cards, tool-free mind you, which should prove to be flexible enough for most people. A lot of other mid-tower cases have 8 slots, but honestly this shouldn’t be a problem having one less.
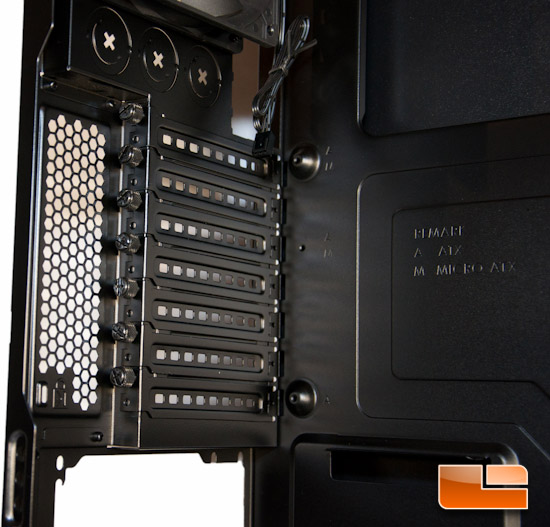
Expansion cards can be installed up to 450mm in length, which is absolutely gigantic! For your reference, the Nvidia GTX Titan measures 10.5” (267mm), the GTX 690 measures 11” (280mm), and the AMD 6990 measures 12” (305mm).
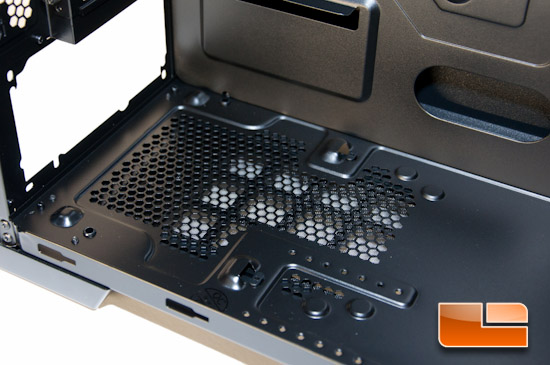
Looking at the bottom is the ventilation hole for your PSU. There are no rubber bumpers here to reduce vibration on the points that your PSU stands. One thing that I have to point out are the holes on the bottom right of the below picture. After reviewing Corsair’s Carbide Air 540, it had similar holes for tool-less PSU mounting. I grabbed the bracket from that, and sure enough, the holes line up perfectly, but the bracket is too tall for this case. I’m not sure why Corsair bothered with these holes – perhaps this is just a cookie cutter section – but there is no tool-free bracket included with the 300R.
Flipping to the right hand side of the case, we see yet another familiar configuration.
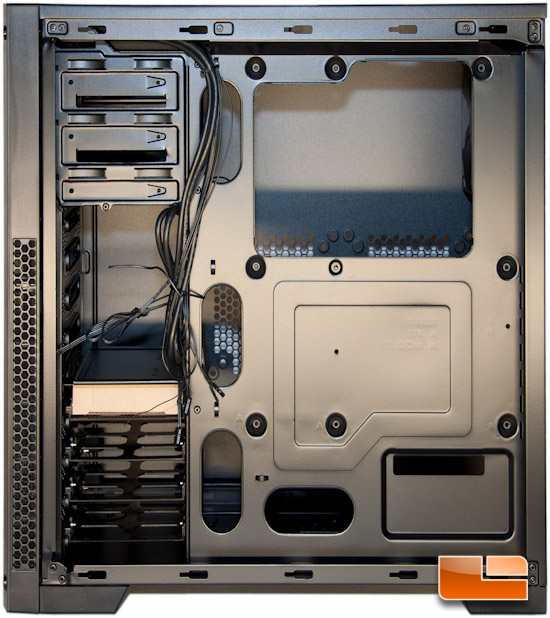
To start off, behind the motherboard tray you get approximately 3/4” (19mm) of room between the tray and the door. This isn’t as much as I’ve seen on other cases, but it is still a nice generous amount compared to what you used to get, and should prove to be enough to get you by.
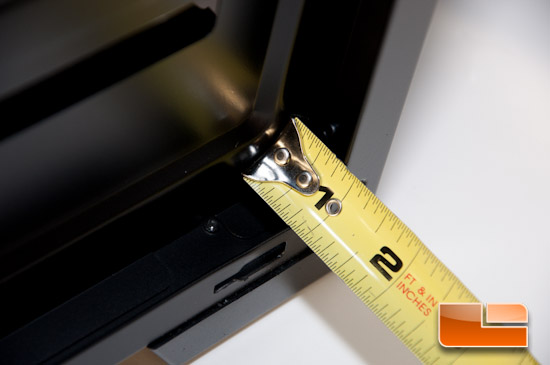
On the left hand side, the rear of the 2.5”/3.5” drive bays is where you will connect your HDDs or SSDs. This definitely makes for a cleaner installation, and I’m happy this method was ever invented.
Next to that are the I/O connectors, which again include your power button, HDD activity, reset button, HD audio, and USB 3.0. Unfortunately the USB 3.0 connector is NOT backwards compatible with USB 2.0, so if you don’t have a front USB 3.0 header on your motherboard, you’re out of luck with these ports.
That about wraps up the tour of the inside of Corsair’s Carbide 300R, so let’s take a look and see how easy it was to install your average hardware inside.

Comments are closed.