Cooler Master Cosmos II Ultra Tower Case Review
By
Building in the Ultra Tower Cosmos II
Given how massive this ultra tower is we figured we would not have much problem doing our build and we were right. Cooler Master really put some good thought into the layout of the grommets and cable management options in the Cosmos II Ultra Tower.

If you couldn’t tell how massive this case was by the dimensions take a look at this P67 ATX motherboard and how it looks like a micro-ATX mounted on the motherboard tray.
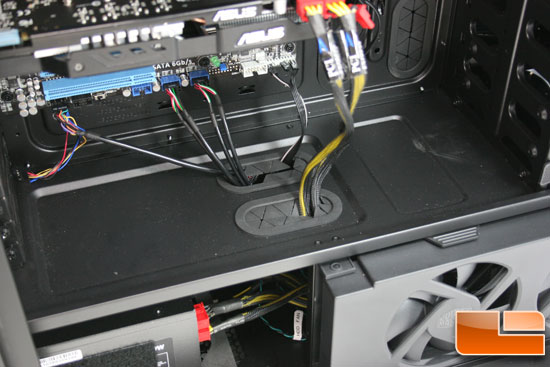
A feature we really liked was these grommets between the PSU zone and the motherboard area. One issue we have had with some of the cases lately is the ability to run the GPU power cables in a clean way without resorting to extensions and these grommets address it nicely.
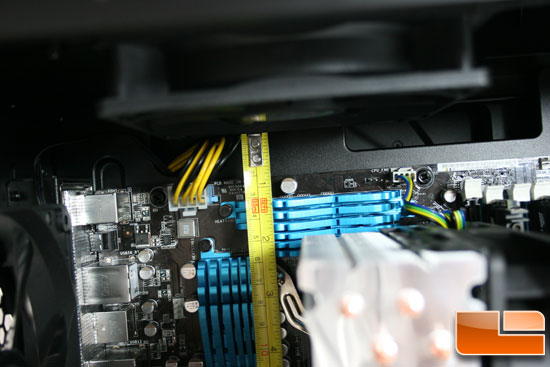
This view shows you that you have about 25mm between the edge of the motherboard and the bottom of the 25mm thick fan. So you should be able to mount a thin radiator and 25mm fan inside and then add fans in the roof compartment for full push / pull configuration if so desired. It might make adding and removing memory sticks a bit tight depending on your motherboard but awesome that you can do that and keep it all internal.
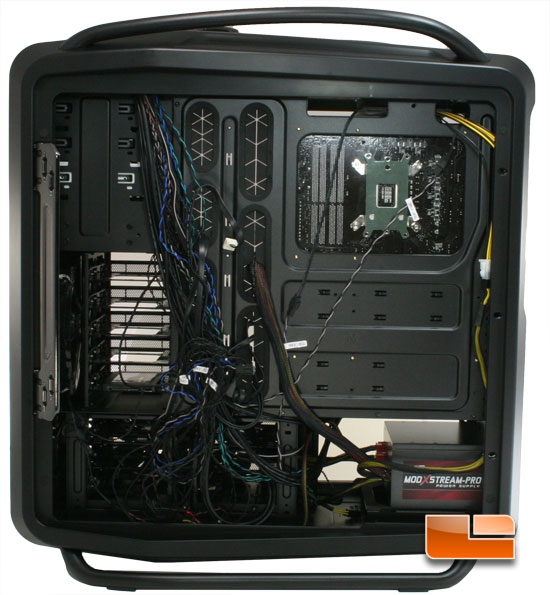
Moving around to the back side it is obvious we did not take the time to utilized all of those zip anchor points or the included adhesive cable wraps but you can see that the large open space next to the PSU makes running power cables a piece of cake. If we spent a bit of time zip tying all these wires it would make for a nicer looking build but the door still closed even with this wad back there.
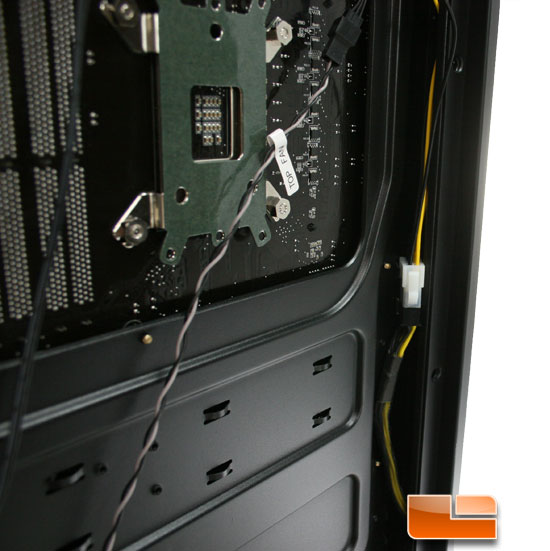
Thank you Cooler Master for including an ATX power extender with the Cosmos II case because it was the only way to make it all the way to the top of this Ultra Tower. This gives you another view of the amount of room behind the motherboard tray. For such a large case and wide case we were a bit surprised it wasn’t more space but it was enough for our build.
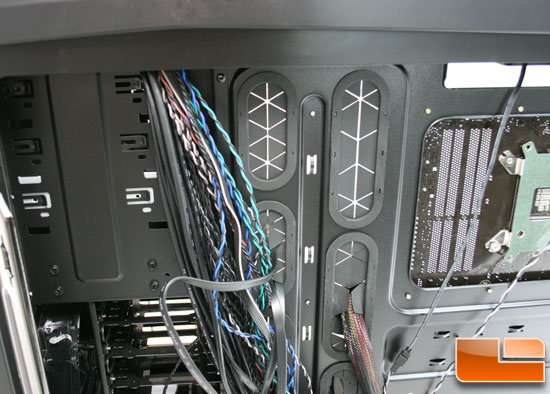
Not sure about you but when we broke apart the bundle of wires coming out of the top of the Cosmos II we were thinking WOW that’s a lot of wires. The reason for this is the top mounted fan controller and LED switch. The Cosmos II can run as many as 9 fans off this controller broken out as 3 top, 3 HDD, 2 GPU, and 1 Front and has 9 LED two pin cables for fans that separate the LEDs from the fan power.
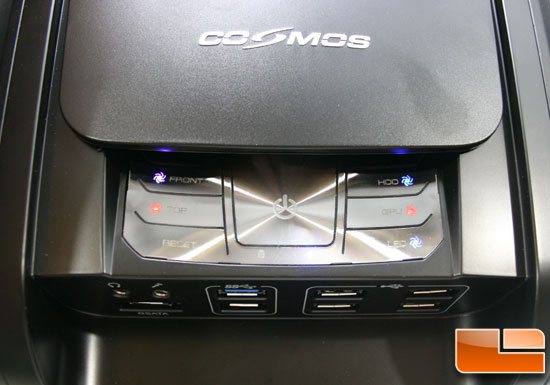
Now that we have the system powered up you can see the LEDs for each of the fans. Unfortunatly since this is a silver plate it was hard to control the reflections and the power light below the power button is washed out. The LEDs for each of the fan zones change color and beep depending if the fans are set to low, medium, or high. Low is red like the top button on the left middle, medium is blue like the HDD top right, and high is a purple like the front in the top left. The button on the bottom right turns the LEDs on and off for any fans that have this which by default is only the front fan.
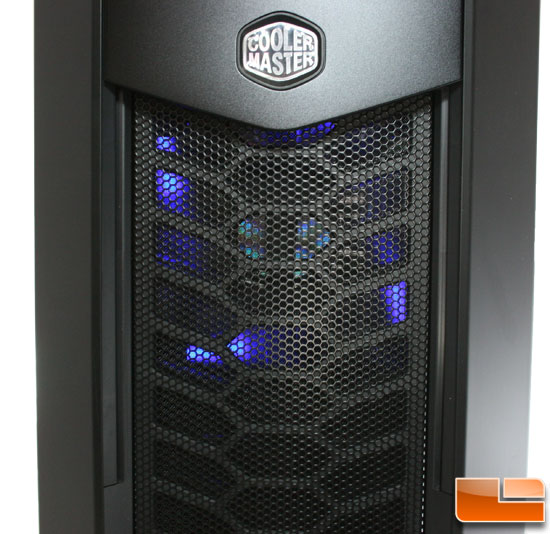
Here is a shot of the front fan with the blue LEDs turned on to give the front of the Cosmos II a little bling factor. Given that this case does not currently have a window option this is about as blingy as you get so an on / off switch for the lights is a nice feature.
Noise and Cooling: The included fans are all low RPM variety and even on the high setting made almost no noise with both doors off. Putting the side doors on made this case extremely silent so we do suspect there must be some sound abatement material in those thick doors. We would say the airflow is a bit on the light side which is to be expected with low RPM fans but something to consider if you are doing an air cooled rig. If you pop a water loop, these case fans should be plenty for your DRAM and motherboard chip sets.

Comments are closed.