AZZA Nova 8000 Full Tower ATX Case Review
AZZA Nova 8000 Internal Impressions
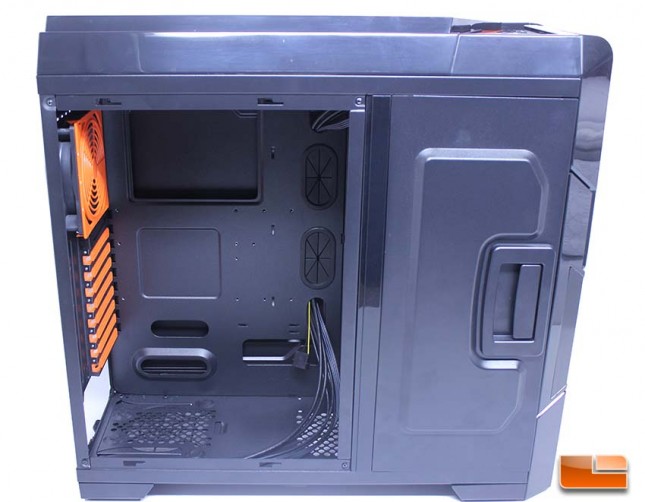 AZZA has separated the motherboard section from the HDD section of the case by utilizing two independent doors. This also simplifies installation, as the HDD side of the enclosure simply swings open, while the motherboard side slides off easily by pulling on the indented area to the rear of the panel. The motherboard panel is held on by two thumbscrews. Unfortunately, the thumbscrews are not captive, which is something we’ve been happy to see from other manufacturers in the past.
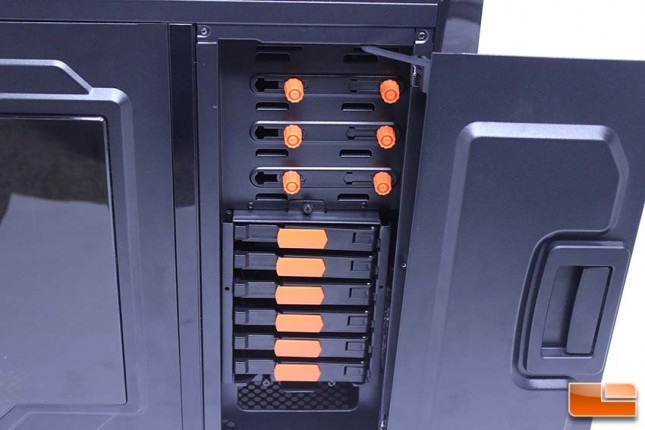 The HDD area door opens by pulling on the handle and then sliding the door towards the front of the case. The handle feels high quality and the release mechanism works well. The ODD area features three bays that offer a tool free mechanism for attachment, while the top bay uses screws. This is important, because when installing a bay reservoir, it’s best to use screws. The Nova 8000 offers up support for six 3.5″ HDD’s to be installed, two of which are connected through the hot swap connectors.
 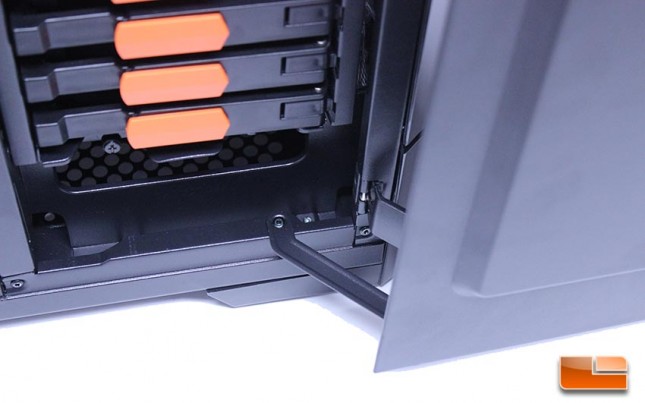 The swivel mechanism felt very sturdy and didn’t have any flexing issues when opening or shutting the door. AZZA really did a good job here and I really like the idea of being able to access the HDD area and Hot Swap drive bays without opening the motherboard side of the case. Aesthetically and functionally, this design is great. The space between the bottom of the HDD area and the 240MM radiator/fan mount area is quite spacious and will allow for installation of a thick radiator such as the XSPC RX240 along with fans in a push or pull configuration without issue. You won’t be able to use fans in a push-pull configuration unless you use a thin radiator.
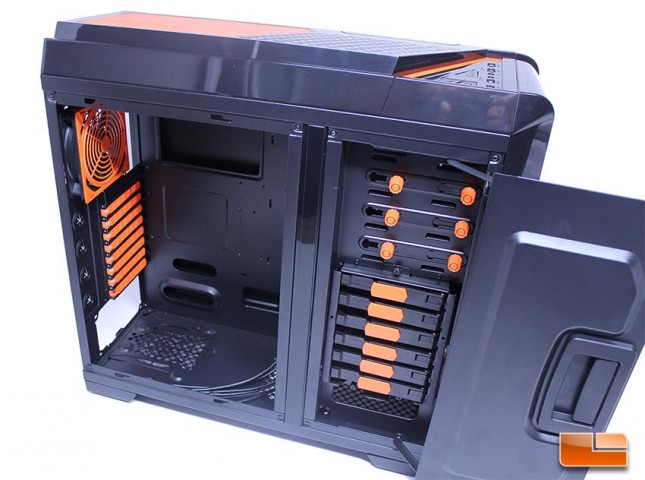
By using this dual chamber design, AZZA was able to minimize the size of the removable panel, making it easier to work with and less prone to flexing. I am very happy with the design of the Nova 8000’s side panel configuration and the panels are sturdy and well built. 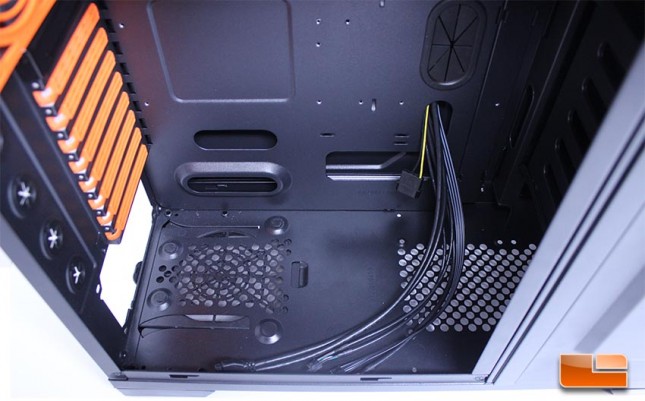 I am also happy to report that the Nova 8000 has rubber grommets and uniformly colored motherboard to panel connectors. Unfortunately, not all of the internal routing holes have grommets and the ends of the USB and Front Panel Audio connectors aren’t covered, so the multicolored cable ends show.
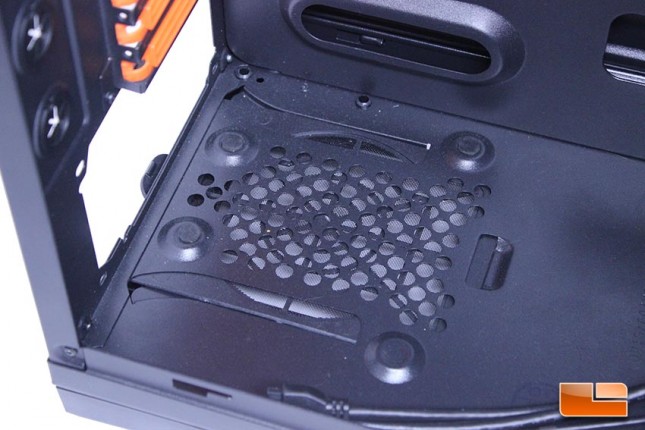 The PSU mounts on top of four anti-vibration pads that are arranged over the removable filter. These pads help with reducing noise produced by the PSU and eliminating vibration. Because these pads are just held on by adhesive, removing the PSU can cause them to lift, so keep an eye on things when you’re removing and installing a PSU on these types of pads.
 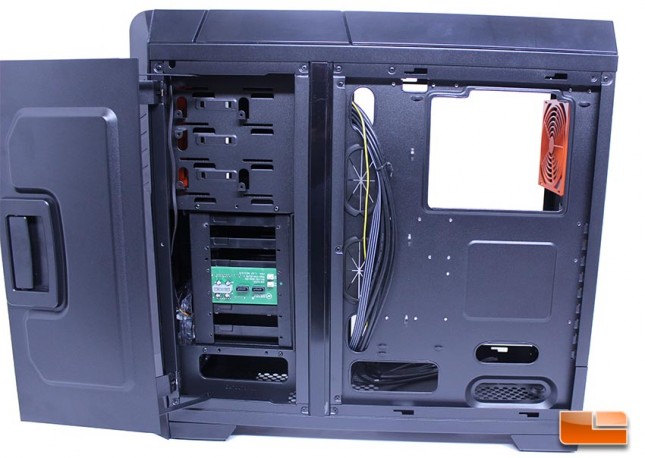 The backside of the case opens up and reveals a very clean layout. Unfortunately, we see a glaring problem. There is no path between the SATA area and motherboard area besides the space under the HDD cages. What does this mean? You can’t route your SATA cables behind the tray and through the grommets, they have to be routed across the motherboard tray to your motherboard, which we will show you later. The SATA power cables to your HDD/SSD’s will also need to be run along the bottom of the case to your PSU. For a case preaching aesthetics, this is an annoying design flaw or oversight.
 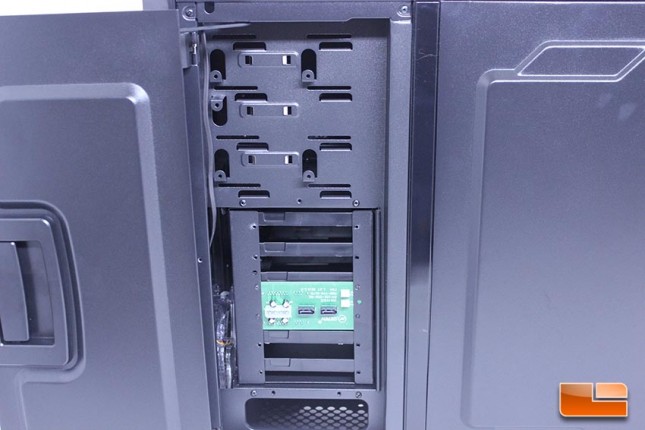 The Nova 8000 has two 2.5″ SSD mounts that are easily accessible via the left side HDD access door. This feature allows for additional Hard Drives to be used by freeing up the six 3.5″ bays, or for the Hard Drive cage to be eliminated in SSD-only builds, which will free up space for water cooling components. This is a very clean installation point, as the SATA cables can easily be routed together and run alongside the crease to the cable routing cutout.
 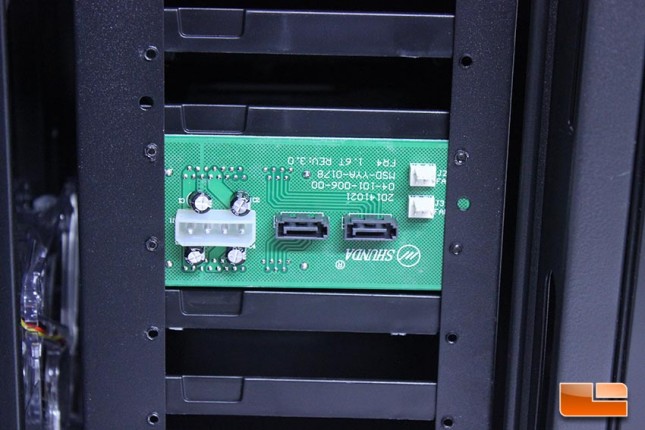 The SATA backplane is branded SHUNDA and connects directly to SATA cables that route to the motherboard and is powered by a 4-Pin Molex connector. This allows users to Hot Swap HDD’s without having to do anything more than pulling the handle of the case, sliding the door and removing a drive. There are also two 3-Pin fan connectors here, but they aren’t able to be speed controlled. This is a SATA3 backplane, as expected.
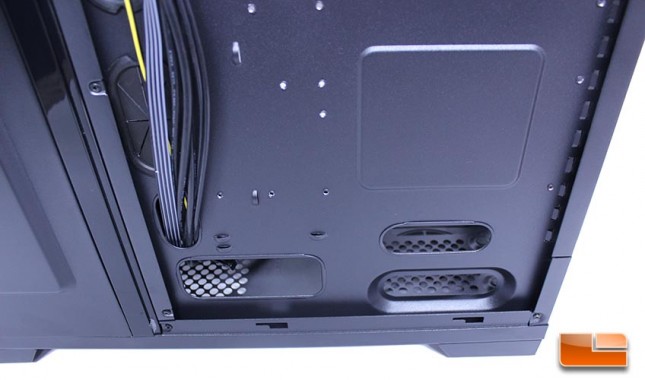 Unfortunately, there is not much room behind the motherboard tray for cable routing. It is a large case, so you can spread the cables out and make due, but given the size of this case, I really think more spacing is needed behind the motherboard tray. We see an ample amount of cable tie-downs to assist in routing your cables. We will explore the amount of room to route cables more during the build process of the review.
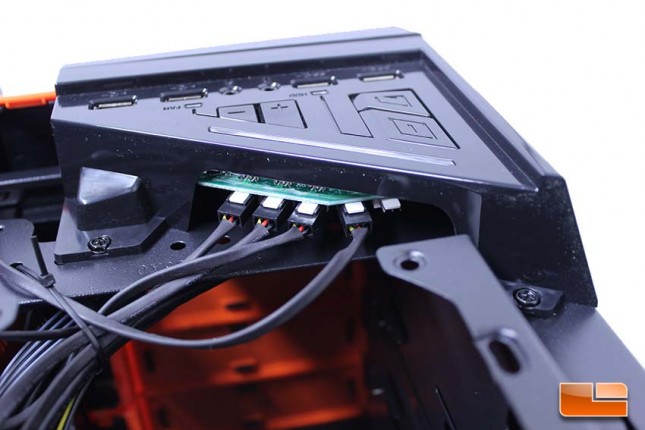
Removing the top panel of the motherboard tray will allow access to the internal fan controller. The internal fans are cleanly routed to this controller and there is room for an additional fan to be added to the controller. Unfortunately, there is an issue with running the controller on slower fan modes with certain fans, which we will address later in the review.
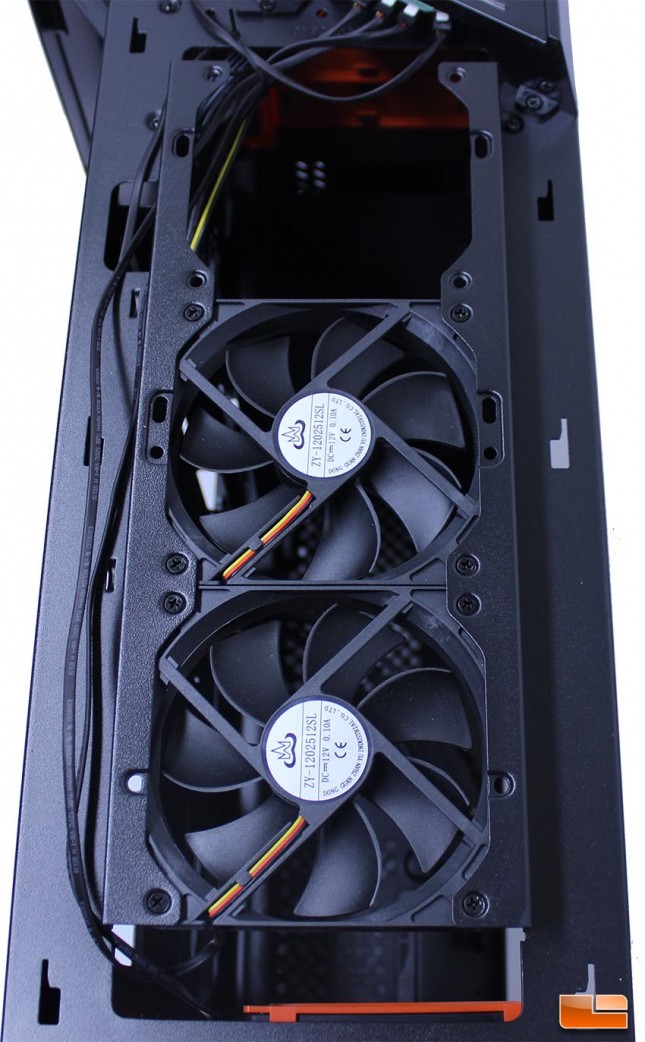
AZZA has routed the fans, which are nicely sleeved with heatshrink tubing, to the fan controller through a tie-wrap and the fan installation is clean, without any obstruction or issues. There are mounts for three 120MM fans, or two 140MM fans. This means 360MM and 280MM thicker style radiators such as the XSPC RX series, which will offer superior surface area and cooling capabilities, are supported by the Nova 8000.
Besides the issue with cable routing behind the motherboard tray from the HDD area not being possible because there isn’t a cutout or break between the two sections, I was very impressed with the internal features of the NOVA 8000. Rubber grommets are being used, the cables are a subtle black/grey color and the motherboard area is separated nicely from the HDD area. I would like to see more room behind the motherboard tray, of course, so AZZA should definitely address this. The Hard Drive hot swap bays are very welcome, but to be honest, I don’t know many people who have a need to hot-swap HDD’s in a home system like this. Overall, this case is really nicely designed internally and it has a lot of potential for expansion and ability to be used with various watercooling configurations.

