ASUS X99-A Intel X99 Motherboard Performance Review
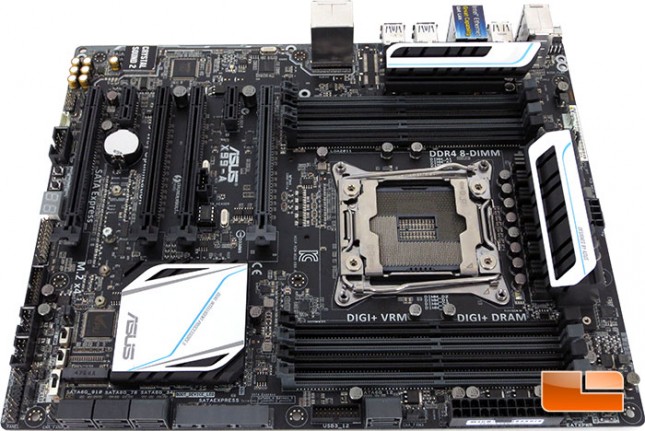
The ASUS X99-A Intel X99 motherboard isn’t the flashiest of boards, but I’m good with that. I’m not one for all the LED’s or fancy heatsinks. While it may not be flashy, it’s certainly a good looking board. The black PCB with black and grey expansion ports and DIMM slots are well contrasted by a couple of white heatsinks. At first glance the overall layout looks good, but let’s take a closer look at the layout and the features shall we?
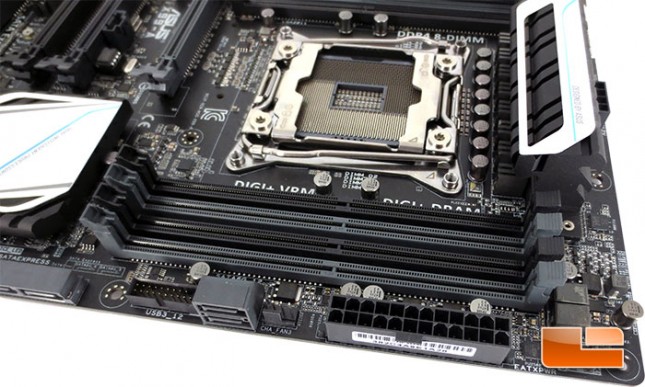
The ASUS X99-A features a total of eight DIMM slots, four seen above, and another four on the other side of the Intel LGA2011 V3 socket. Each of the ASUS DIMM slots is what ASUS refers to as a Q-DIMM slot. There is a lock on only one side of the slot, while the other side locks into place as you depress the DDR4 memory module. Each of the DIMM slots will support an 8GB module at up to 3333MHz (O.C.) for a total of 64GB of DRAM. In front of the DIMM slots, there is the MemOK! button, 24pin ATX power, 4pin Chassis fan header, a pair of SATA III 6Gbps ports, and one of two internal SuperSpeed USB 3.0 headers.
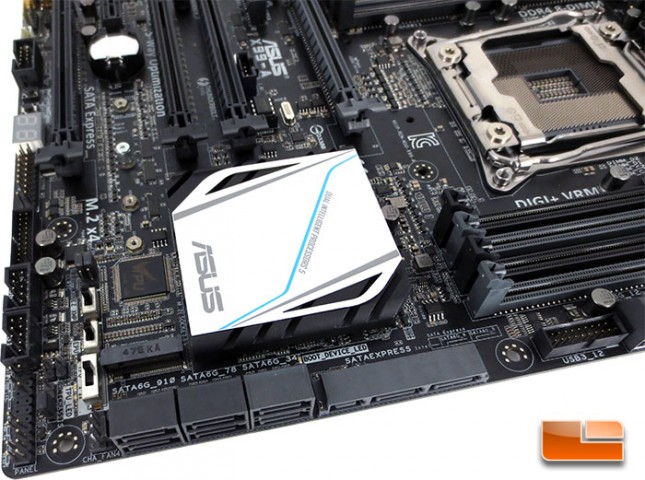
Spinning the ASUS X99-A motherboard around, we can see the tops of the remaining six SATA III 6Gbps ports and the SATA Express ports. Just to the left of the SATA ports is a second 4pin chassis fan header. Along the edge of the ASUS X99-A is the front panel header, a pair of internal USB 2.0 headers, the second internal SuperSpeed USB 3.0 header, as well as the T.P.M. header (Trusted Platform Module). Between the various headers and the heatsink there is a handful of switches, starting with the bottom one we have the TPU switch, EPU switch, and the EZ XMP switch.
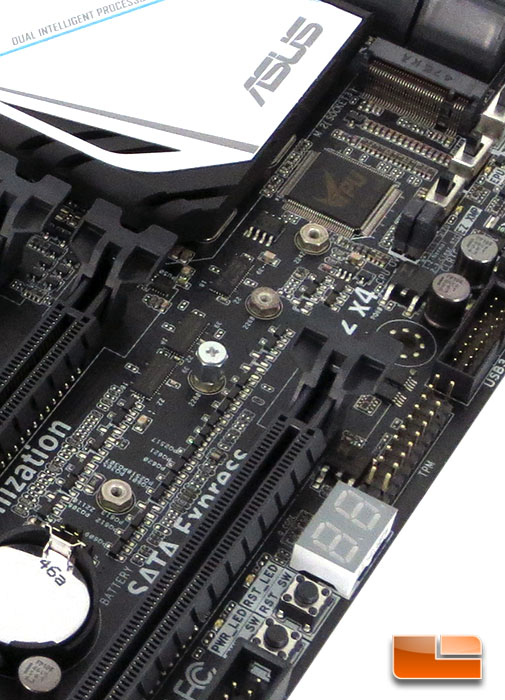
The ASUS X99-A also features an M.2 Socket 3 slot tucked in there. The M.2 socket will fit type 2242/2260/2280/22110 storage devices.

The ASUS X99-A Intel X99 motherboard has eight SATA III 6Gbps ports, plus a SATA Express port that adds an additional two SATA ports to the mix, making a total of ten SATA III 6Gbps ports.
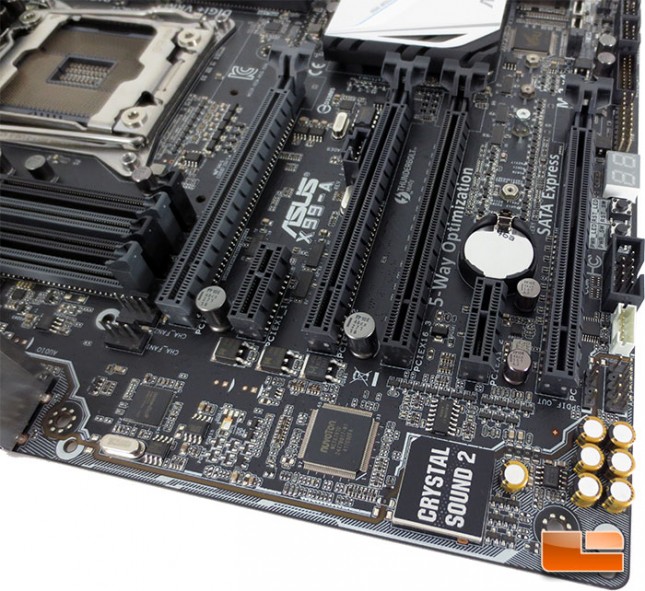
Spinning the ASUS X99-A around once again, we can start off where we left off above. Continuing down the edge of the PCB, there is the Debug LED, power and reset switches, Serial port connector, 5pin extension fan, and the front panel audio header. Along the leading edge of the ASUS X99-A we can find the audio components that are being used on the X99-A. One of the technologies that ASUS started to do (and has been copied by many) is to separate the audio components from the rest of the board. This helps to keep the electrical interference down to a minimum from the rest of the board, providing a better quality audio experience. Underneath the Crystal Sound 2 shield, there is a Realtek ALC1150 high definition audio codec. Coupling the ALC1150 codec with the premium Japan-made audio capacitors is going to provide the X99-A with a great quality audio solution.
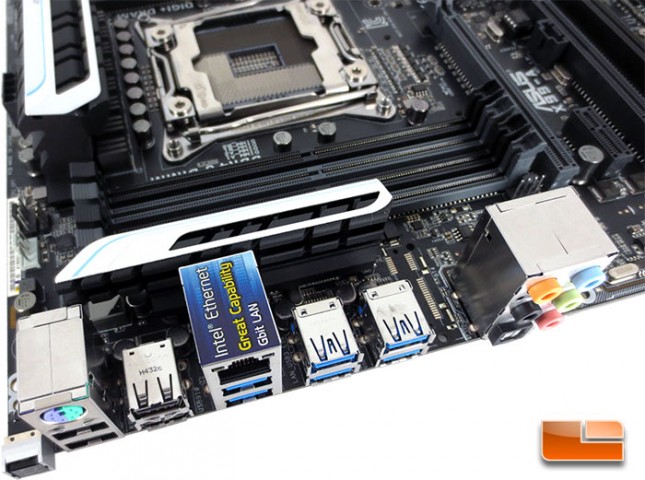
Looking down on the last corner of the ASUS X99-A motherboard, there are a couple of features that stand out. First off, we can see the remaining four DIMM slots mentioned earlier, to the left of the DIMM slots we can see the CPU fan header and Optional CPU fan header if you’re in need of two CPU fans. Although it’s a bit hidden, to the left of the heatsink there is a single 8pin CPU power

The I/O panel on the ASUS X99-A is pretty typical of what I’ve come to expect. Moving left to right, there is the BIOS flashback button, a single PS/2 port, four USB 2.0 ports, a RJ45 Gigabit Ethernet ports, six SuperSpeed USB 3.0 ports, five 3.5mm audio jacks, and an optical SPDIF out. When it comes to the SuperSpeed USB 3.0 ports, five of the six on the I/O panel are controlled by the ASMedia USB 3.0 controller while one of them is controlled by the Intel X99 chipset. The left pair, the right pair, and the top center are all controlled by the ASMedia controller while the bottom center is controlled by the Intel X99 chipset controller.
