How To Get More Graphics Performance From The Intel NUC
How To Get More Graphics Performance From The Intel NUC
There is a fine line that all manufacturers must be watch when it comes to having the right balance between energy-efficiency and performance. Intel’s motherboards have always been conservative when it comes to overclocking or pushing a system beyond its originally designed plans. We understand that Intel does this to ensure stability, reduce tech support costs and make sure all of their products have a long and successful lifespan. As enthusiasts, we understand that the shipping clock speeds of processors are safe and designed for mainstream users, but we want to push the limits and get the most from all of our platforms.
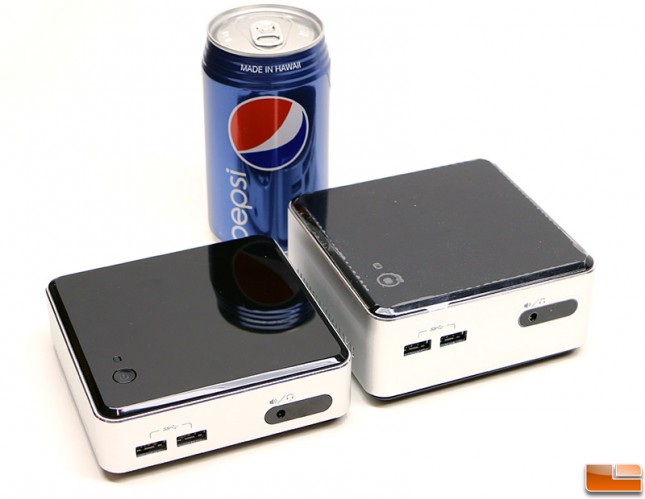
One of our favorite Intel platforms right now would be the Intel NUC Kit D54250WYKH (supports 2.5″ drives ) and Intel NUC Kit D54250WYK (no 2.5″ drive support). These tiny platforms really make you rethink what form factor a desktop should be and pack a pretty powerful punch thanks to the 4th Generation Intel Core i5-4250U processor and Intel HD 5000 graphics that powers the little system. We recently ran across a BIOS setting that allows you to unlock the graphics performance of this platform and just had to share it in the off chance you own this model or were looking into picking one up to try. It isn’t every day that you find a BIOS setting that allows you to boost performance by over 30% and it got us excited.
Just to be clear, this modification only works on the new Intel Core i5 powered models as the lower cost Core i3 version does not have this capability.
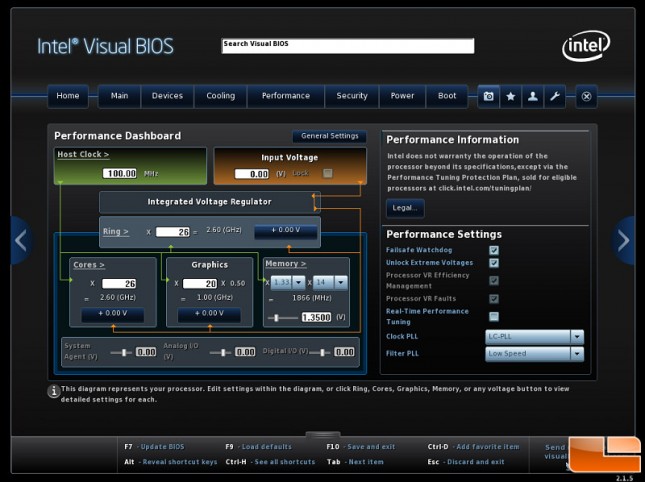
To get significantly better graphics performance you have to go into the Intel Visual BIOS when the system it is powering up and change one to three settings depending on how aggressive you want to be. Entering the BIOS is simple as you just need to hit F2 when the system posts. Once you get into the Intel Visual BIOS you’ll see a full color user interface and your mouse will be able to work. Click on the performance tab that is located on the top horizontal menu. You should see the menu above.
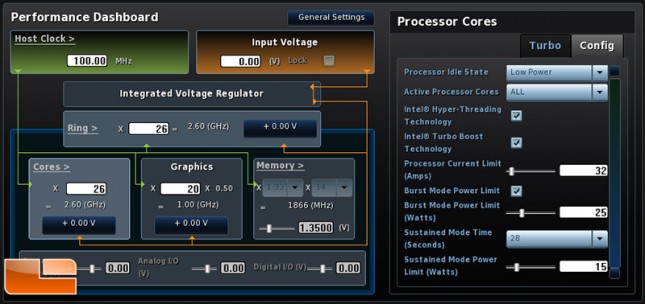
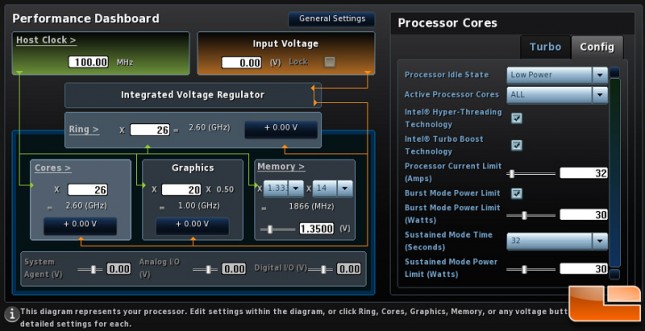
Once you get into the performance tab you’ll see a flow chart style diagram with the various voltage and multiplier adjustments for things like the processor, graphics, memory and so on. You’ll want to click on ‘Cores’ and that will bring up the ‘Processor Cores’ menu on the right hand side. From there you want to click on the ‘Config’ tab and it then you’ll be looking at what we are showing you in the image above. The last setting under the configuration settings is called Sustained Mode Power Limit and this gives you the ability to adjust the amount of Watts that the processor can hold at any given time. It turns out Intel might have been a little conservative or improperly set this limit to just 15 Watts. You can adjust this setting from 0-100 Watts and we’ve found that adjusting it above 15 Watts will give the graphics a major performance boost.
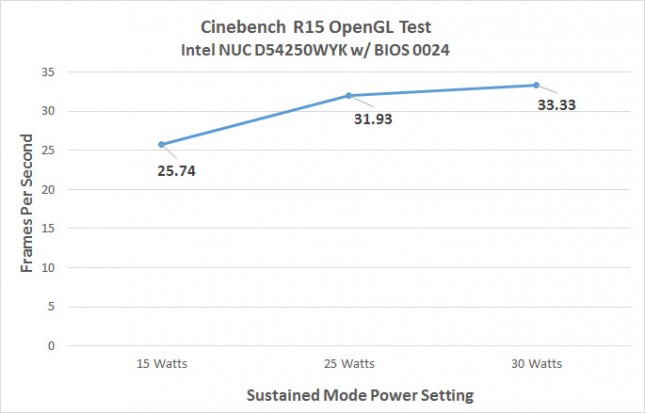
You can raise the sustained mode power limit to 25 Watts without impacting any other settings, but once you get past 25 Watts the Burst Mode Power Limit and Sustained Mode Power Limits are linked together. This means if you set one to 27 Watts the other will also be set to 27 Watts. We found the sweet spot for performance on our NUC D54250WYKH was with the Sustained Mode Power Limit set to 30 Watts and we increased the Sustained Mode Time from 28 to 32 seconds. By doing this we are basically telling the processor that it can consume more Watts and hold that power for a longer amount of time. We ran some tests at various Sustained Mode Power Limits and found that CPU performance didn’t budge, but Graphics performance jumped up significantly. Power consumption and temperatures also increased since we increased the maximum TDP that the processor can use. From what we can tell the Intel Core i5 processor shares the TDP load limit parameters and that the graphics core takes priority and that is why we are seeing gains there. What kind of gains are we seeing?
Cinebench R15 has an OpenGL benchmark test and we went from 25.74 FPS to 33.33 FPS by doing this simple power adjustment in the BIOS. This is a 29.5% performance increase and when you are running integrated graphics you want all the performance that you can get. This is a huge performance gain and the best part is there wasn’t a significant jump in power consumption or a huge rise in heat. The CPU benchmark remained between 233 and 234, so there was absolutely no performance gain or decrease on the CPU side by changing this power setting. The only gains to be had were on the graphics side with the Intel HD 5000 Graphics.
Let’s take a look at some additional benchmarks like 3DMark and Metro: Last Light to see if there are also graphics performance gains to be had there as well.

