Building Your Own Intel Core Duo Gaming Notebook
Building The System – WiFi & Hard Drive
Now that the Intel Centrino Duo is coming to life I can finish up the installation by installing the wireless card and the hard drive.
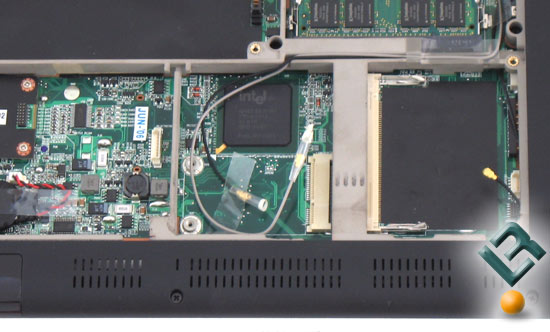
When it comes to wireless cards you have two different form factors to pick from. The Clevo M57U comes with both mini-PCI and mini-PCIe slots. I wanted to use the mini-PCIe slot as I’ve never used one before. The Intel PRO/Wireless 3945ABG Network Connection. This WiFi card has the flexibility to connect to many of the most popular industry standards-based WLAN (802.11b, 802.11a, & 802.11g) infrastructures. Wireless internet gaming over with an 802.11g connection is actually decent and something that can be done around the house or at LAN parties.
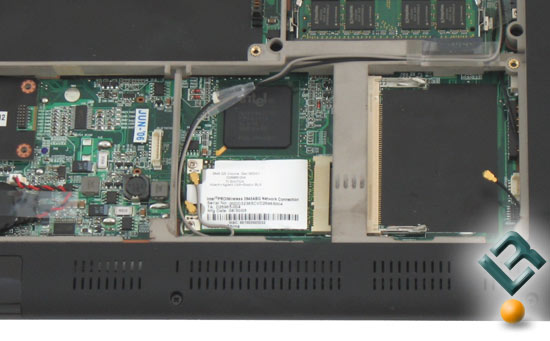
The Intel PRO/Wireless controller card is installed exactly the same way as the Kingston memory modules. Line up the notch on the Intel Pro Wireless card with the socket and insert the card at a 30-degree angle. Once the card is placed into the socket push it down and secrure it down with two screws on the top of the card. The black antenna is attached to the main lead and the white to the auxiliary lead. The antenna is pre-wired around the LCD display, so no wiring is required of the consumer for the wireless card to be installed.
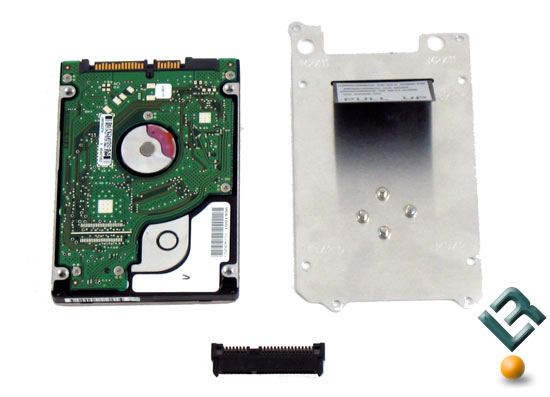
Now that the processor, memory and wireless card have been secured the only thing left to do is install the hard drive. The hard drive mounts in the Clevo M57U are unique and are easy to use. Flip the hard drive you picked out over and line up the hard drive mounting bracket over the drive. Once the holes line up tighten down the four screws and the bracket is now attached to the hard drive. There is a removable SATA conector that needs to be attached to the hard drive. Simply plug this bracket into the drive and the only thing left to do is to install the assembly into the notebook.
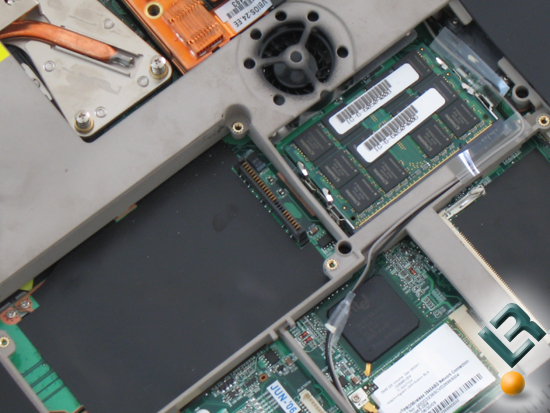
When installing the hard drive into the notebook keep an eye on the pins in the hard drive bay as they must line up with the pins on the SATA bracket that was plugged into the SATA connectors on the hard drive. Simply line up the pins with on the backet attached to the hard drive with these pins shown in the picture above and simply push the hard drive straight down seating it. Once it has been pushed into place it should look like the hard drinve installed below.
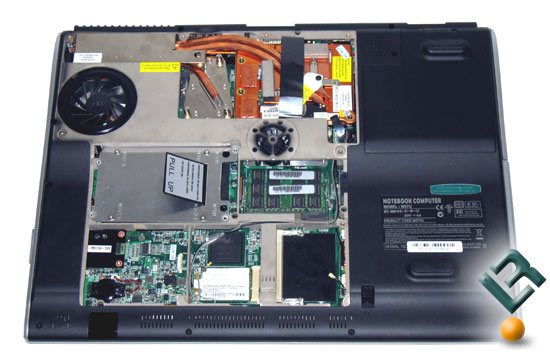
Now that the processor, memory, wireless card, and hard drive have been installed your gaming notebook should like like the one above. Before you re-install the back cover be sure to do a final check to make sure everything is tight and correctly installed. If it looks good-to-go, now is the time to put the back cover on and fire up the system.
Comments are closed.