ASUS ROG STRIX Z270G Gaming mATX Motherboard Review
UEFI Overview
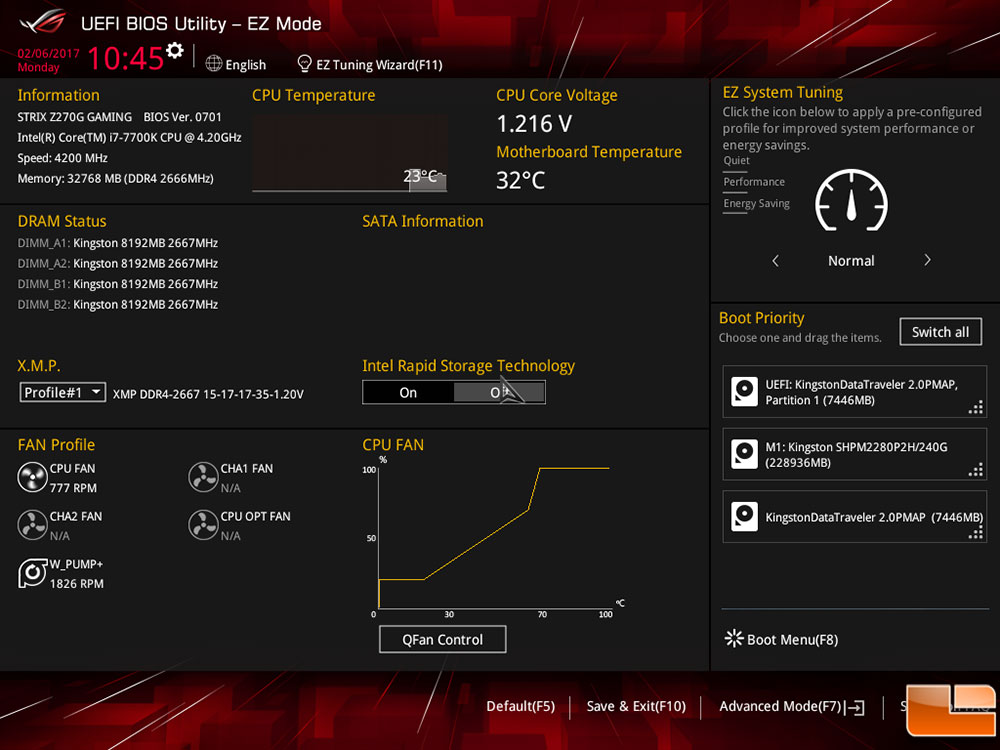
The ASUS STRIX Z270G Gaming UEFI is designed to provide all levels of users easy access to the most common settings and information on the EZ Mode screen. Here you can adjust boot priority, basic system performance tuning, XMP setting and easy access to the QFan Control tool. If you want to get into finer detail settings of the system, the Advanced Mode (F7) provides you all the configuration options possible within this UEFI.
-
- ASUS STRIX Z270G Gaming – UEFI: Main
-
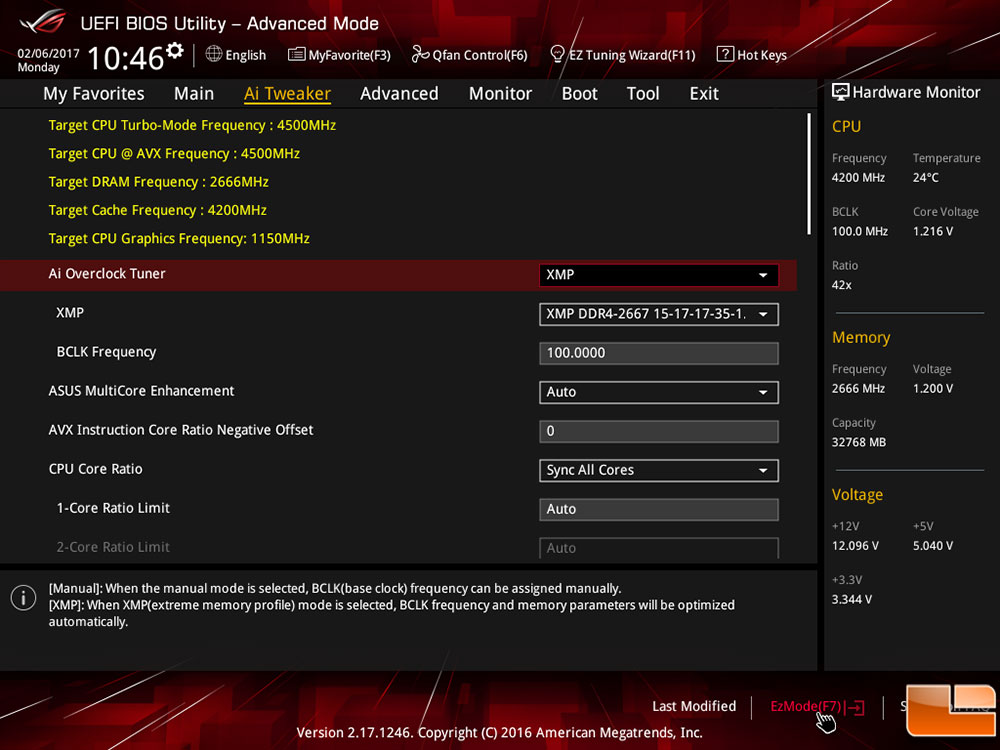
- ASUS STRIX Z270G Gaming – UEFI: AI Tweaker
-
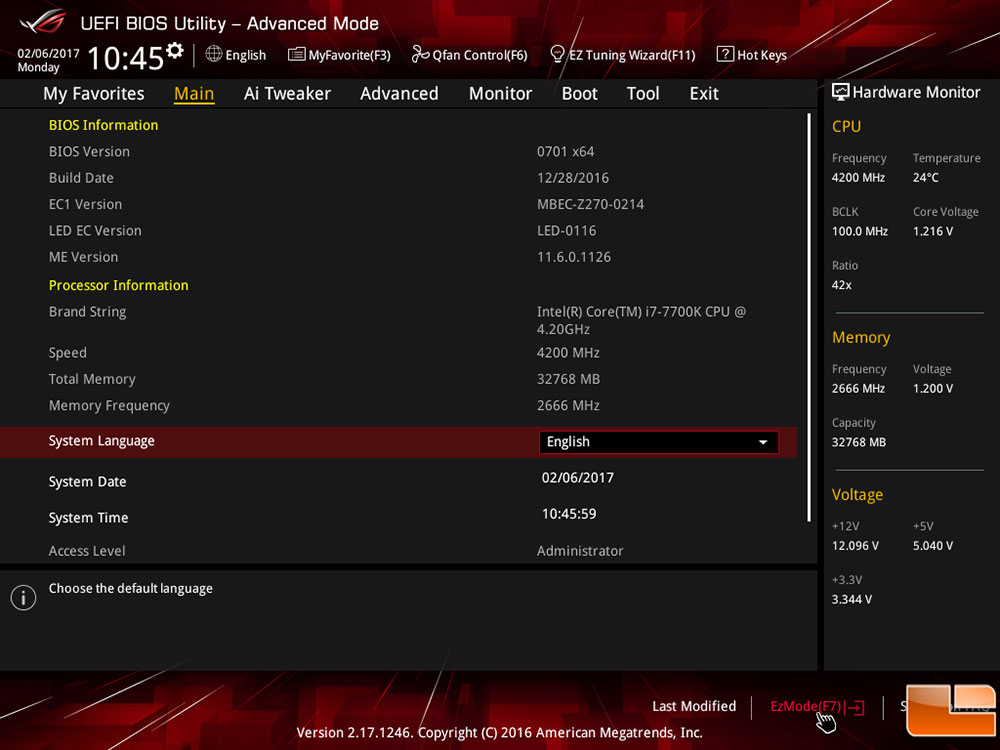
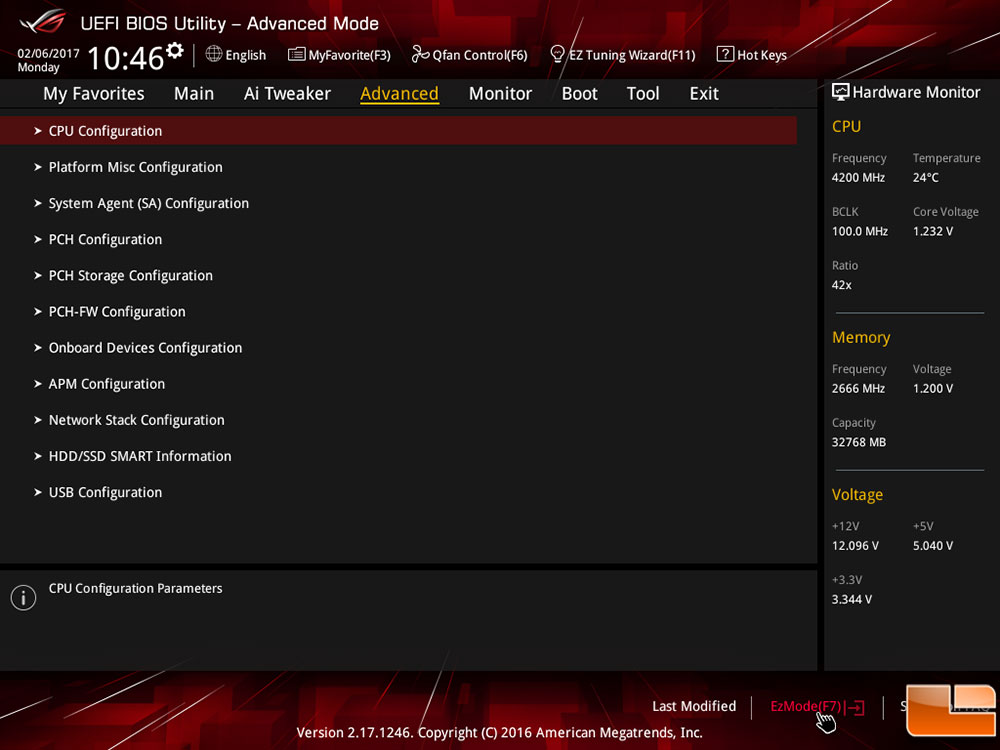
- ASUS STRIX Z270G Gaming – UEFI: Advanced
-
- ASUS STRIX Z270G Gaming – UEFI: Monitor

-

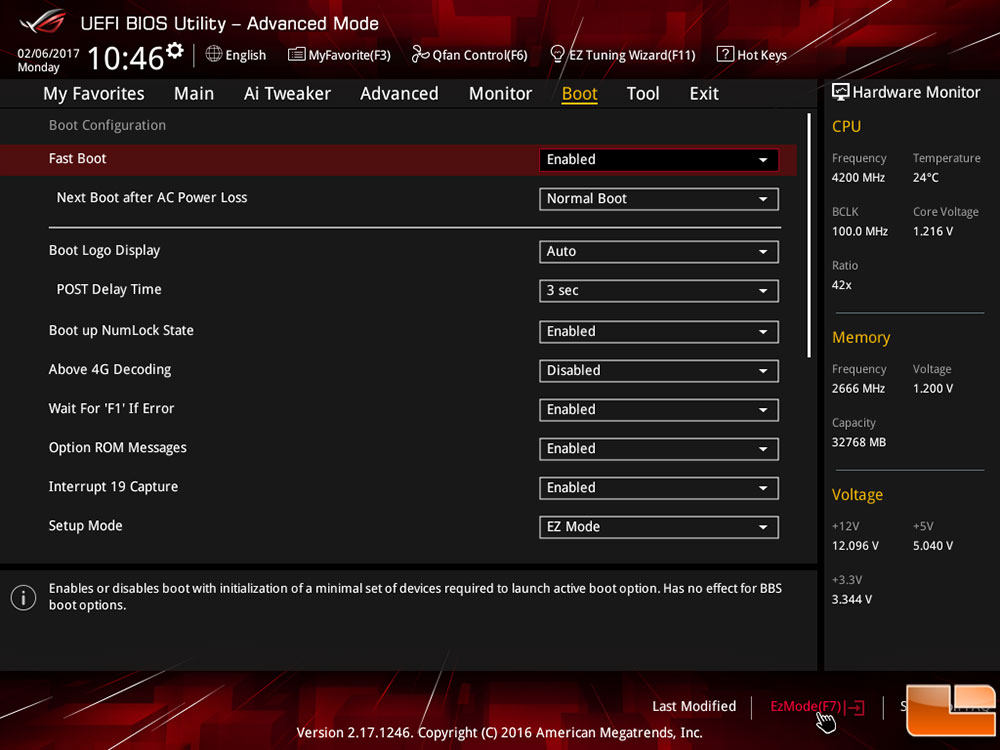
- ASUS STRIX Z270G Gaming – UEFI: Boot
-
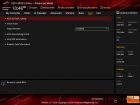
- ASUS STRIX Z270G Gaming – UEFI: Tools
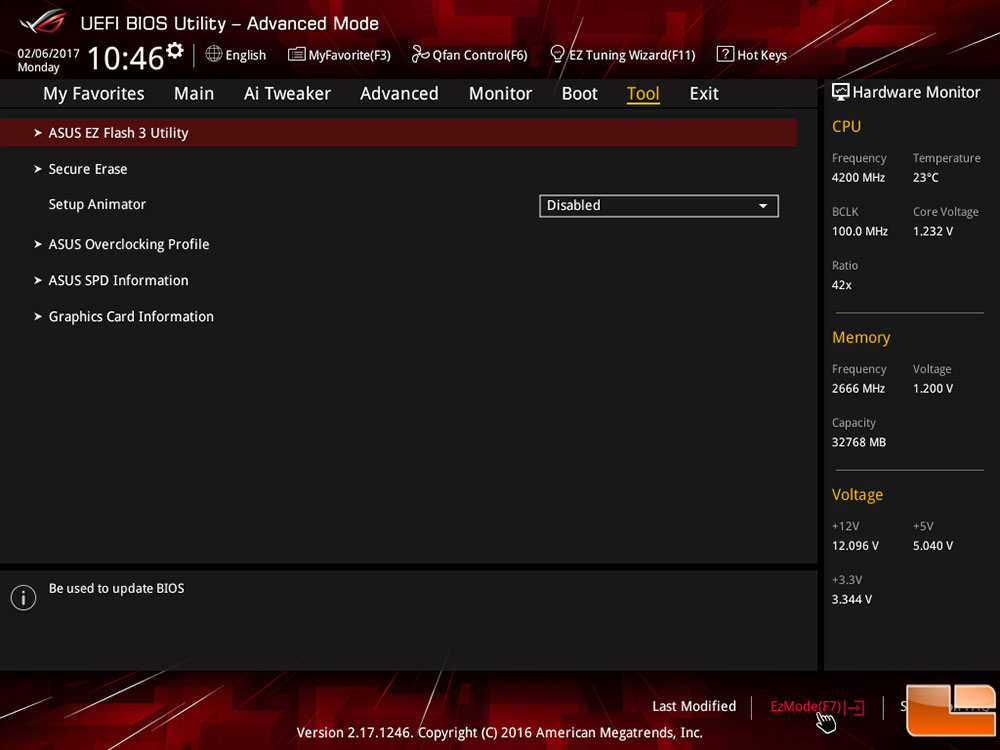
The Advanced Mode (F7) takes you to a more classis BIOS menu layout, with the modern UEFI enhancements. Each of the menu options is presented to allow the user to find the settings they need pretty quickly. Most of the menu’s provide multiple sub-menu’s so the options are broken out into subgroups making them easier to navigate. For the most part, the MAIN menu is mostly for informational purposes, with just a few options to change such as the date/time and language. The AI Tweaker menu is where the majority of the overclocking options are found, sub-menu’s include options to make fine tuning adjustments to speeds, options, and power. The Advanced menu, breaks down the individual components and features on the motherboard to be adjusted. Monitor allows you to monitor the onboard sensors such as temperature. The Boot menu is pretty self explanatory, making changes to the boot sequence and options. The Tool menu has multiple tools built into the UEFI such as EZ Flash 3, Secure Erase, and Overclocking Profiles, along with several additional information tools.
While the ASUS STRIX Z270G Gaming will auto select to run your processor at it’s default settings, should you want to overclock it to squeeze out a little extra performance, ASUS has done a good job at making it easy. First, they have a pre-configured 5GHz one-touch tool within the UEFI. However, should you want to make the adjustments yourself, you can set the CPU Core Ratio to set the clock speed automatically, per core or synch all cores. Beyond that, you manually enter the ratio you want to use, and once you select it, it adjusts the speed automatically at the top of the screen, and sets it once you exit the UEFI. If you know some of your applications are compatible with AVX, you can set the offset to lower the CPU speed individually from the maximum speed. By setting it at 2, for AVX applications, the CPU Core Ratio goes from 50 to 48 in this example.
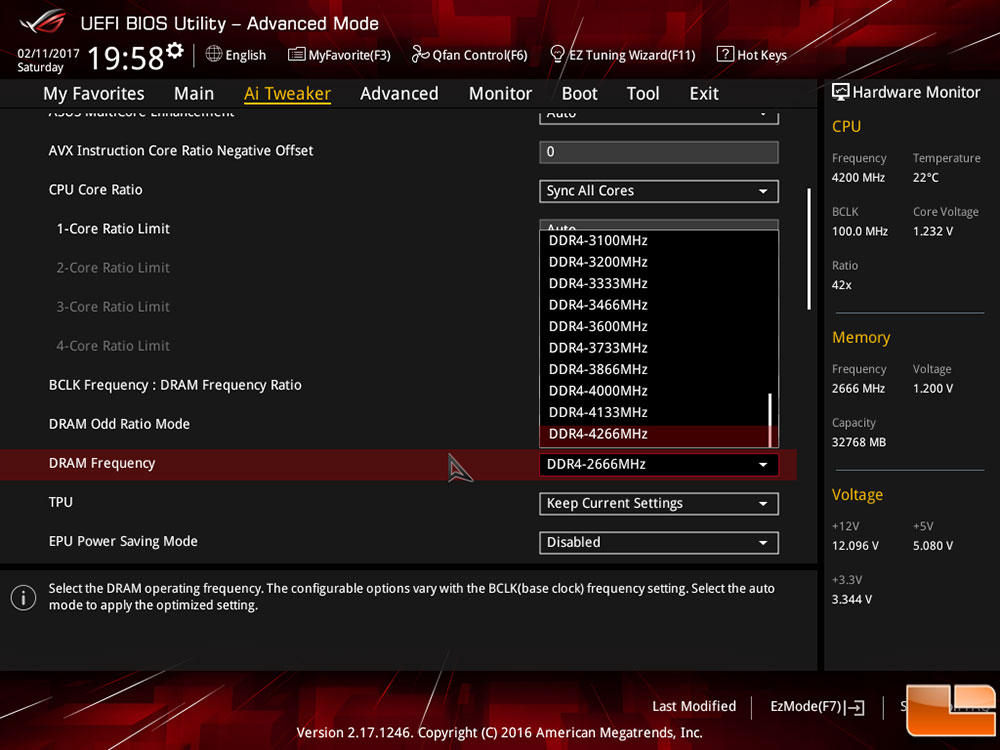
Like most of the options withing the ASUS UEFI, they have made basic overclocking extremely easy. The ASUS STRIX Z270G Gaming has preconfigured DDR4 memory support up to 4266MHz. While you can get running fast by selecting the XMP settings, you also use the drop down menu to select any memory speed you want to try. Of course, overclocking memory isn’t all about adjusting the DRAM Frequency, ASUS has multiple sub-menus available to adjust the individual timings and power settings for the DDR4 memory.
While we haven’t even begun to touch on the wide range of settings available within the ASUS STRIX Z270G Gaming UEFI, it is very easy to find whatever option you want to modify. When you go to exit the UEFI, ASUS will present you with a listing of all the modifications you have made within the UEFI. If you want to keep track, you can always take a screenshot with the flash drive, or save the settings as a built-in profile.
Let’s move on to doing some quick overclocking of the ASUS STRIX Z270G Gaming mATX motherboard before taking a look at the benchmark results.